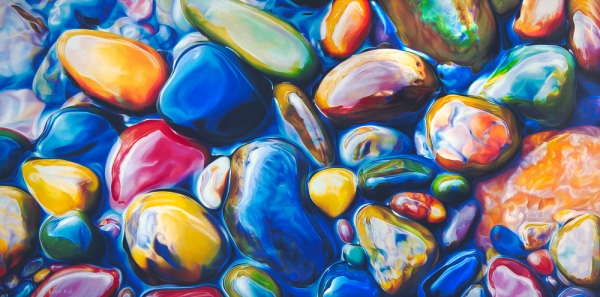
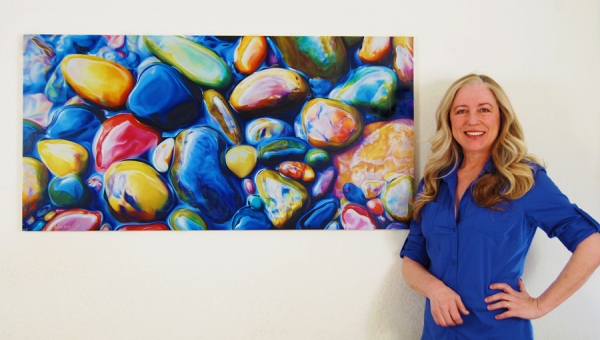
Holiday 2021 Promo15% off all artwork, limited time offer!

Newsletter Subscription

Subscribe to my newsletter to receive 4 to 5 emails per year where I highlight important news, available originals, and seasonal specials.

Blog Category: Icarus Boards

Art Innovation of the Year Award

I'm very honored and thrilled to be the joint recipient of the MAKING A MARK Art Innovation of the Year Award again! 

"MAKING A MARK" is artist Katherine Tyrrell's world renown blog where she "... writes about art for artists and art lovers". The Art Innovation of the Year Award was established by Katherine to "highlight those artist bloggers who experiment and/or create and/or share innovations which help the practice of other artists". 

Here is an excerpt of Katherine's blog post: "Ester for me is one of a few coloured pencil artists (and inventors) who have a proper appreciation of how to bring coloured pencil art (and inventions!) to the market in a way which gets it taken seriously. It's one thing to produce it, it's quite another to get it sold! ...Ester Roi has started to: produce oversized giclee prints from works in coloured pencil ...uses canvas in order to produce larger originals using coloured pencils (24" x 48")."

Please visit MAKING A MARK to read about all the other 2013 award winners.

Have a joyful, healthy and peaceful New Year!


Open Studio Announcement

On Saturday, January 25th, from 9:00 am to 12:00 noon, I will host my first free "Open Studio" for a maximum of four artists. This is an opportunity to meet and share your artwork in progress, ask questions, watch me demonstrate the Icarus technique and try the Icarus board.

I will have boards set-up for all attendees, plus some basic supplies and refreshments. To sign up please email me at esterroi@gmail. com.

This event is on a first-come, first-served basis, so if you don't make this one there will be more announced regularly on my blog and Facebook.

Bring:

  • your artwork, finished or in progress
  • your colored pencils in use
  • your questions​
  • your curiosity

I'm looking forward to seeing you on January 25th!


“Unveiled”

Title: "Unveiled"
Size: 24" x 48"
Medium: Prismacolor Premier, Caran d'Ache Luminance, Derwent Coloursoft, Faber-Castell Polychromos, Caran d'Ache Neocolor I and II, Holbein Oil Pastel
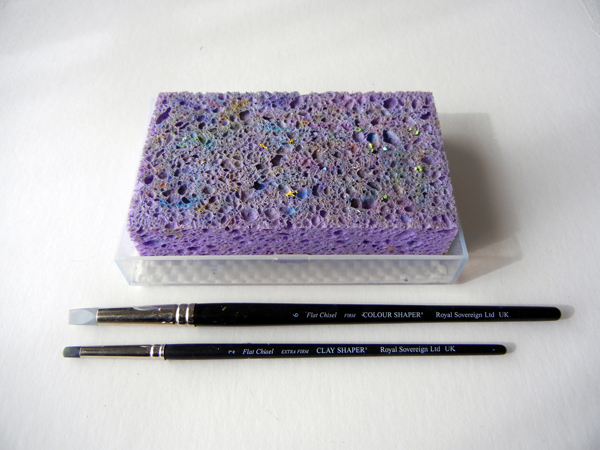
Tools: Tortillions, Paper Stumps and Colour Shapers
Surface: Extra Fine Texture Canvas primed with several coats of clear Art Spectrum Colourfix Supertooth Primer
Technique: Icarus Drawing Board
Presentation: Mounted on a 3/4" Ampersand Claybord, varnished and framed

I'm very proud to have completed this piece, if nothing else for its size alone. It has accompanied me through the trials and triumphs of this past year. It's been a faithful companion even though I neglected it for long spells, at times in favor of other artworks, and later during the long months of my youngest son's illness, surgery and recovery.

It was born out of necessity. I sold its twin brother "In Between", before I had a chance to have it professionally scanned. I had many requests for giclees so I decided to redo it four times its size. Since I was familiar with the subject and technique, I thought I could concentrate on the challenge of working on a much larger scale.
 

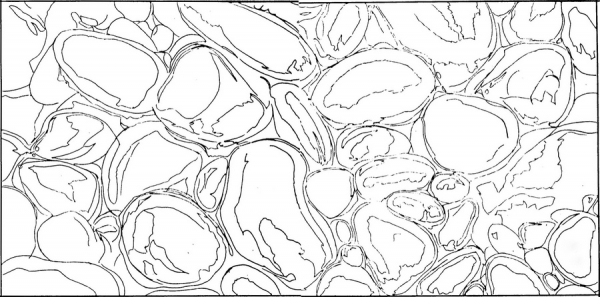
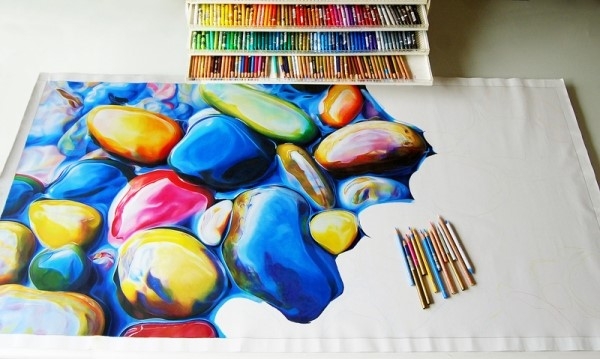
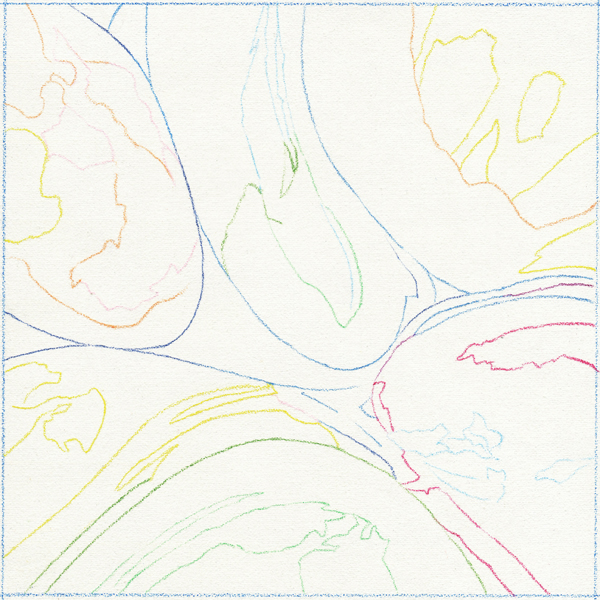
Above is the enlarged drawing I used to trace the outline on the canvas with Verithin colored pencils. I like to use local colors to avoid erasing graphite. On this blog post you can see how I traced it.
 

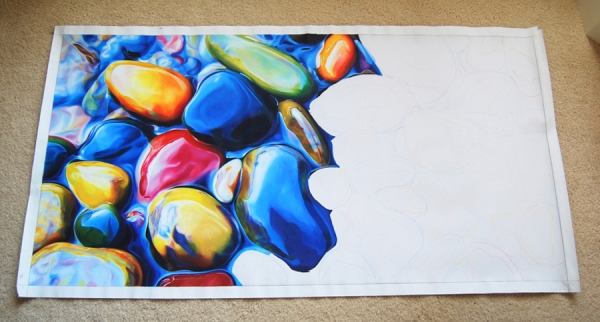
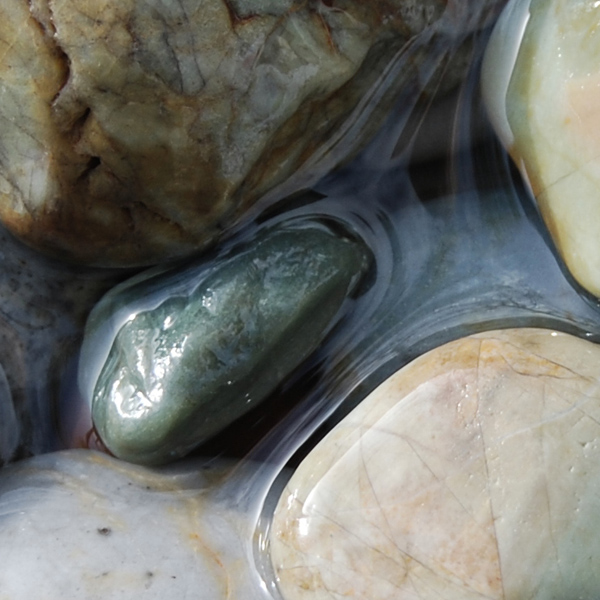
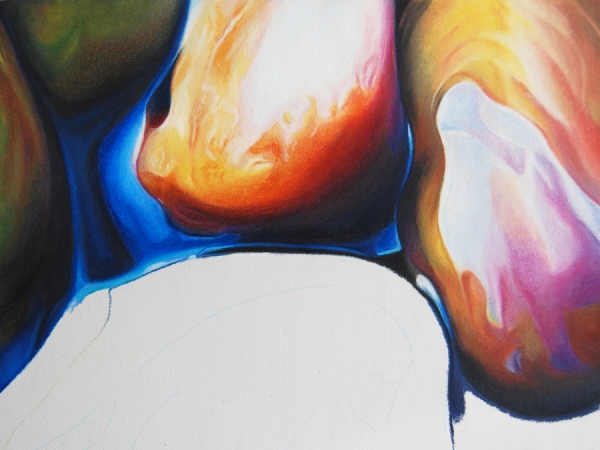
Of course I made some changes along the way. This progress photo shows a large stone on the bottom left corner that I eventually replaced with smaller pebbles. I used an electric eraser to lift most of the pigment and then drew new pebbles on top. 
 

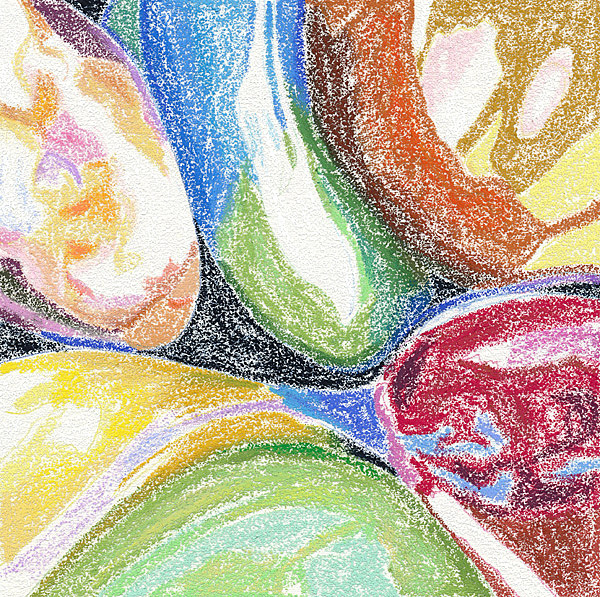
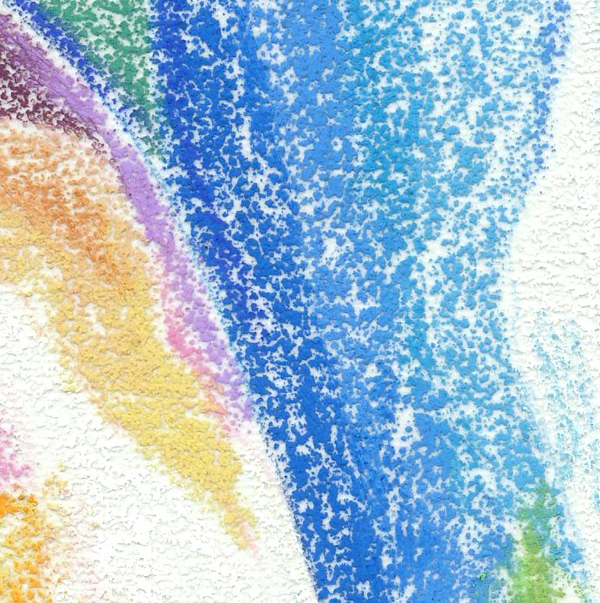
Here I mapped the area with Neocolors and oil pastels. Neocolors are very useful, especially around the edges, because they can be sharpened. Oil pastels come in such a wide selection of colors, I would be limiting my palette if I weren't using them. At this stage I set the temperature of the Icarus board to low. 


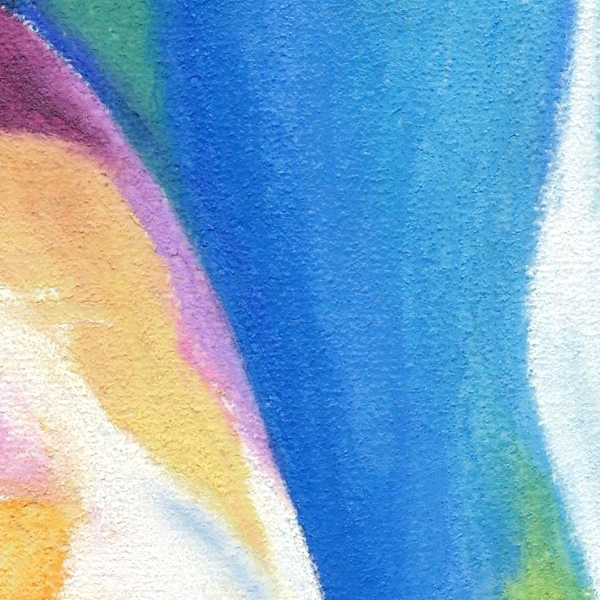
The photo above shows the results of melting the Neocolors and oil pastels. I normally melt at the highest temperature using a colour shaper. Then I blend further and pick up any extra pigment left on the surface with a paper stump. At this point the Colourfix primer's texture has resurfaced again, making the canvas receptive to colored pencils.
 

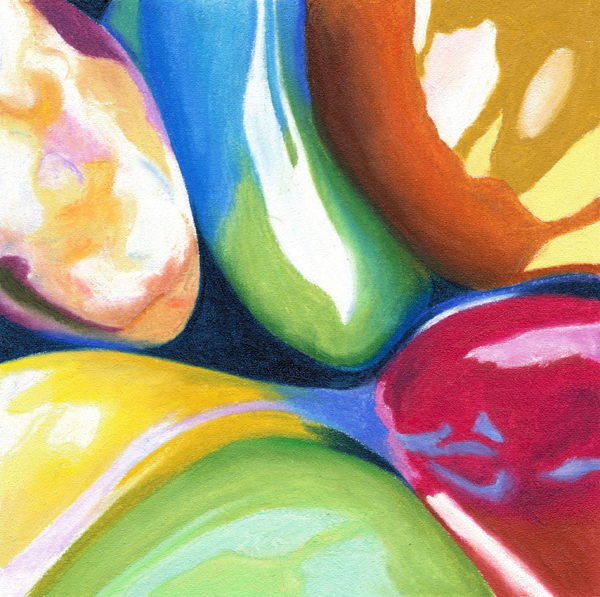
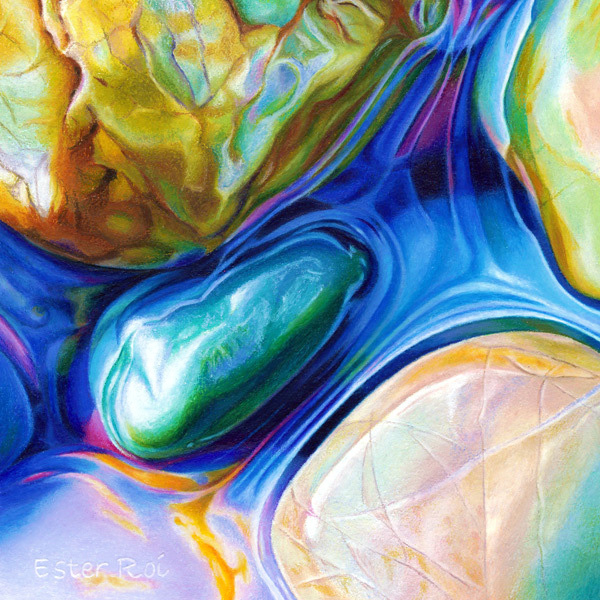
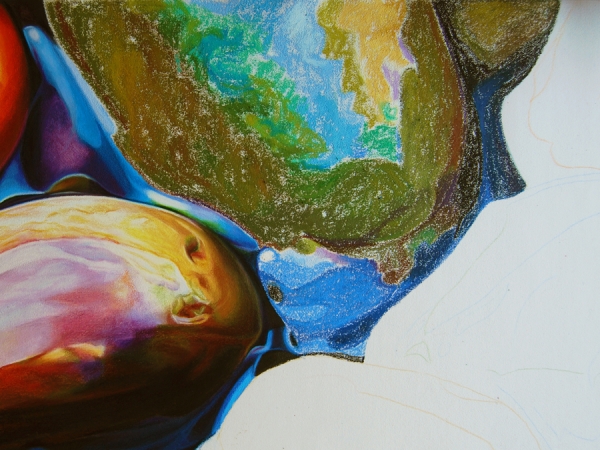
Here you can see how I further developed the colors, values and details using colored pencils, with the board set at medium-low temperature. The perfect tools for blending colored pencils are tortillions and paper stumps.
 

When blocking-in, it's not important to include all color nuances and details. These can be developed later with colored pencils. 
 

Melting the pigment is probably the most exciting application of this technique. Again, it's not necessary to create perfectly smooth blending at this stage; that's what colored pencils are for.
 

Above is another example of how I developed the colors, values and details using colored pencils.
 

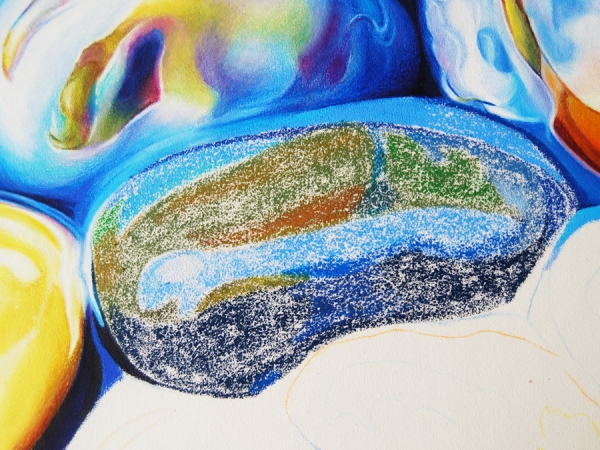
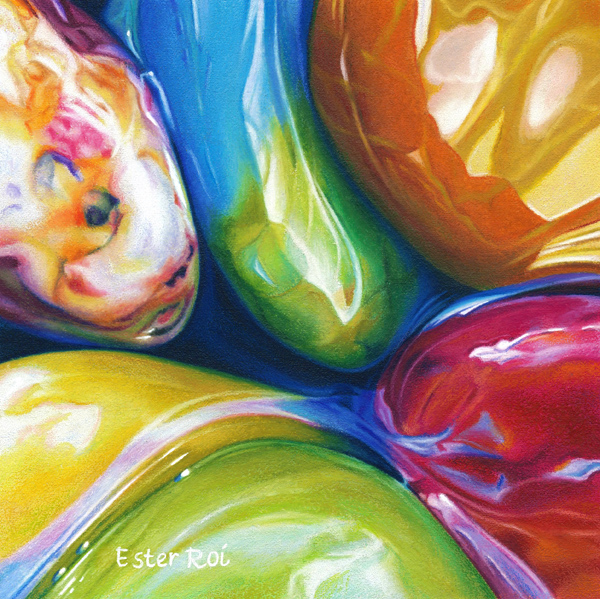
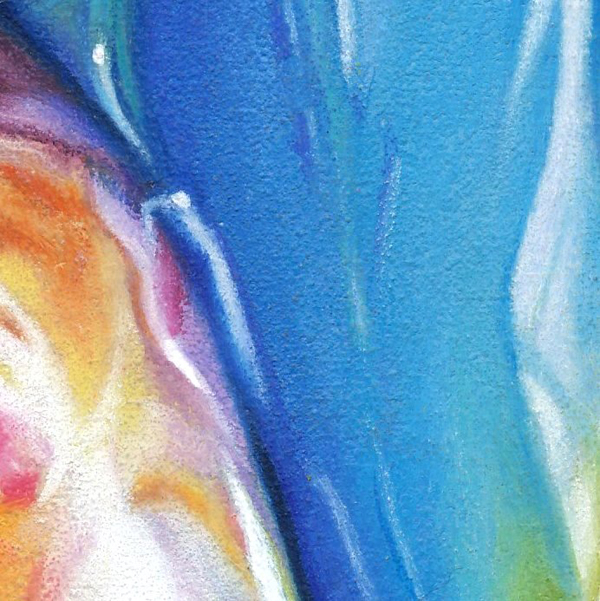
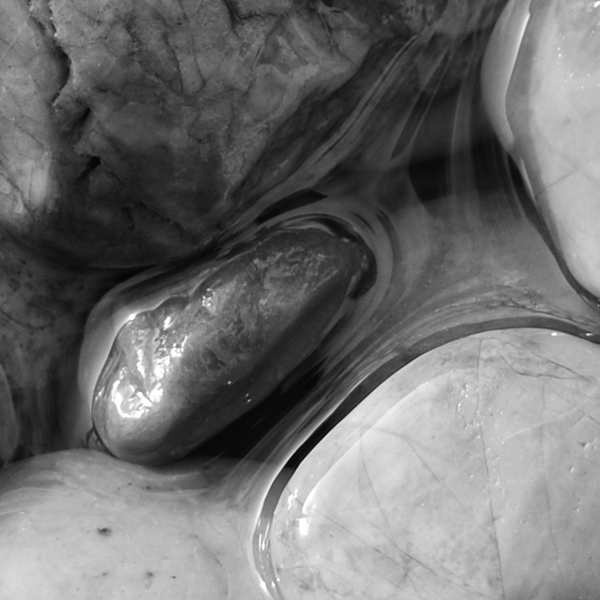
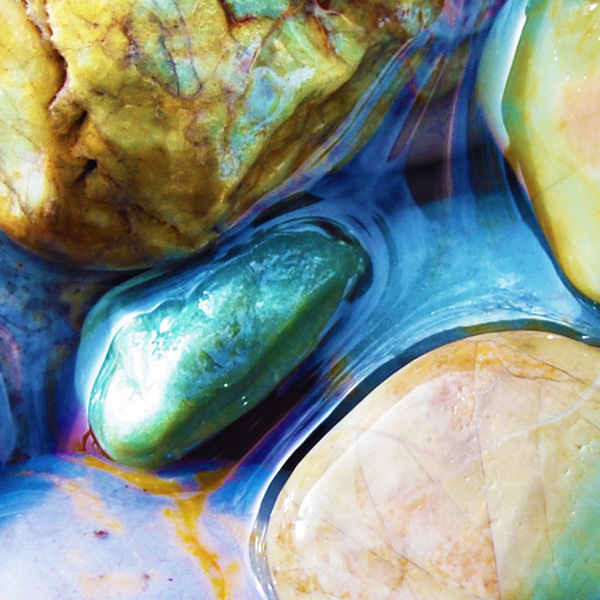
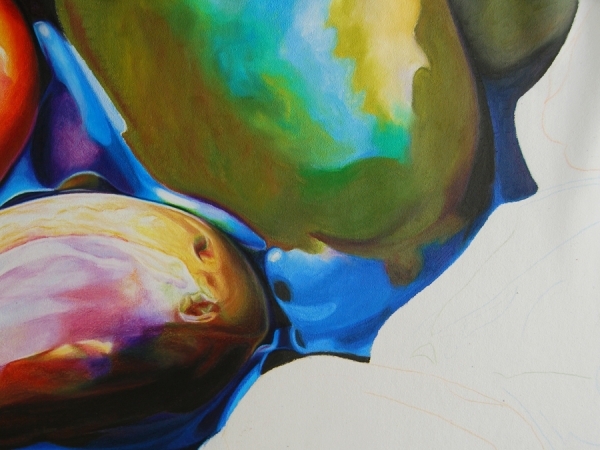
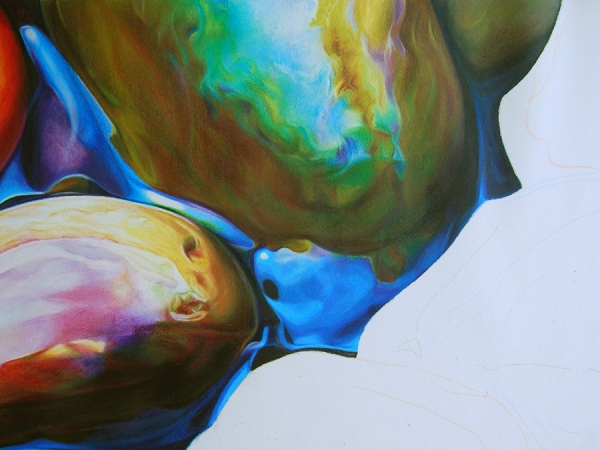
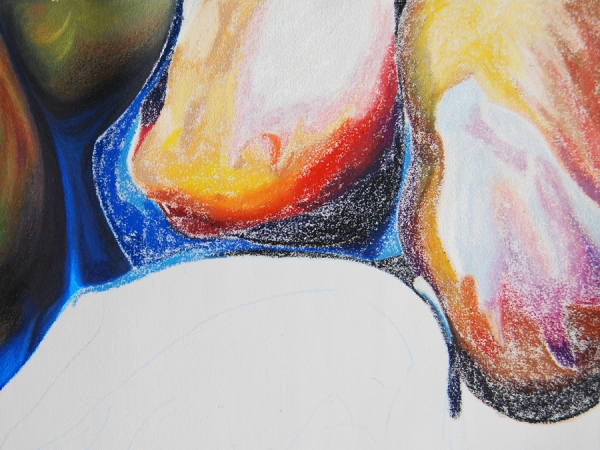
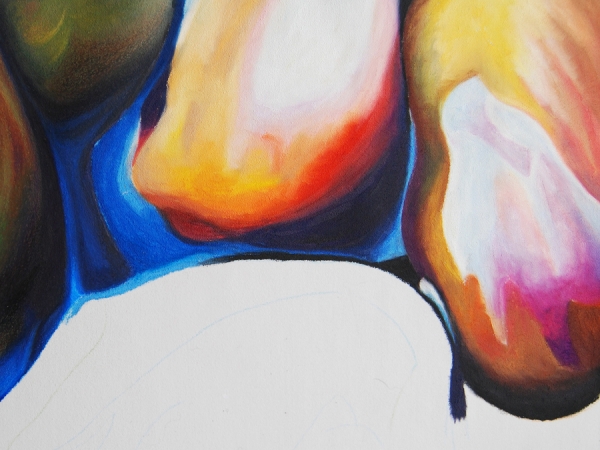
In this third series of close-ups I’d like to talk about how to speed up the process. Mapping with Neocolors and oil pastels is much quicker than mapping with colored pencil. Some of these rocks can measure up to 12 square inches or more!
 

Melting the waxy pigments is a very effective technique for fast coverage of the canvas surface. It compares to dissolving water-soluble Neocolors with a brush, except there’s no color or value change with heat.
 

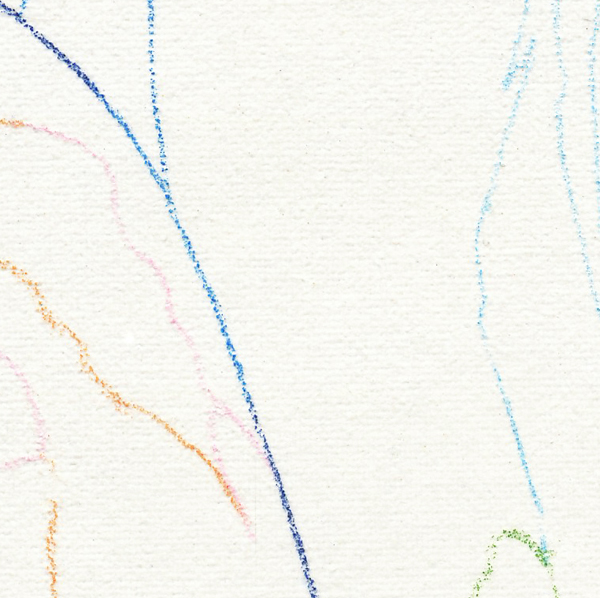
Another valuable time-saving technique is adding all the details at the end. Highlights are time consuming if you need to account for them from the beginning. I created all the thin highlights by subtracting the pigment with a Verithin white pencil and by going over with a softer pencil or with a sharp, white Neocolor.
 

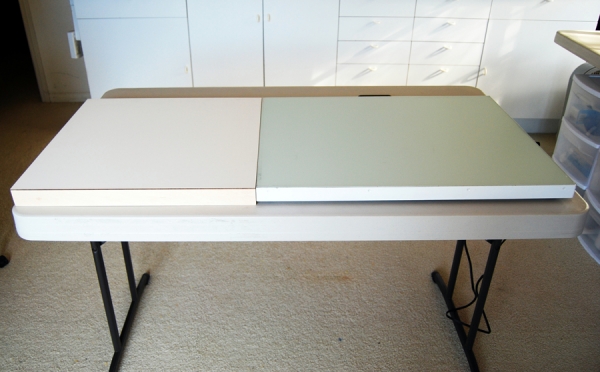
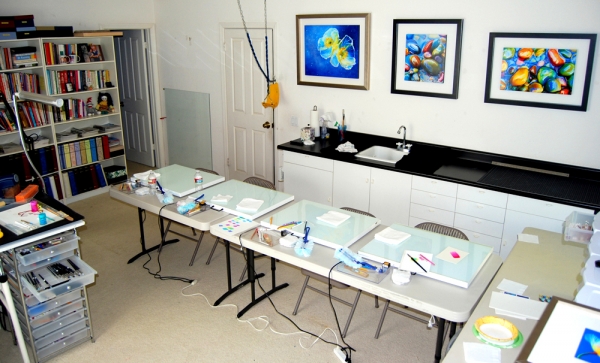
In the photo above I’m showing how I devised an easier way to work with a large canvas. I placed a 20” x 20” claybord, 2” thick, along the side of the Icarus board, thus creating a larger surface for the canvas to rest on. 
 

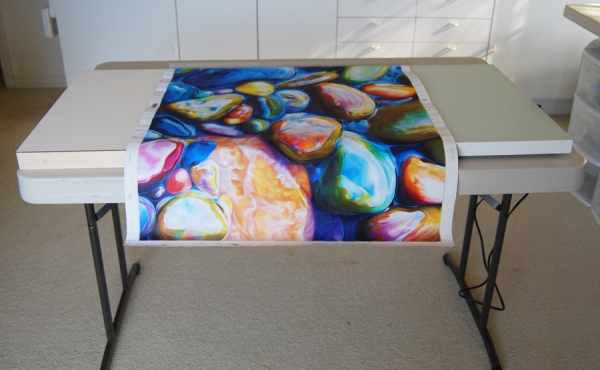
What’s appealing to me about working on canvas versus paper is that I don’t have to worry about creasing or bending it. Canvas is very flexible and can take a lot of abuse.


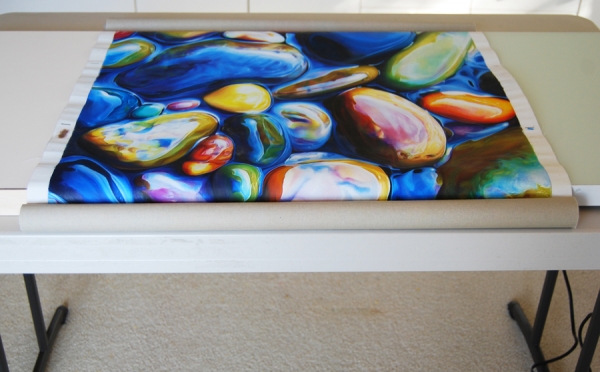
I like to roll up my canvas so that it doesn’t hang over my knees. I use two binder clips to keep the canvas from unrolling.
 

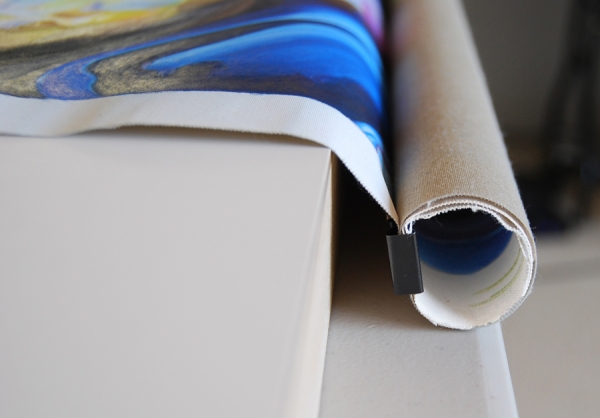
Here is a close-up of the canvas fastened with binder clips.
 

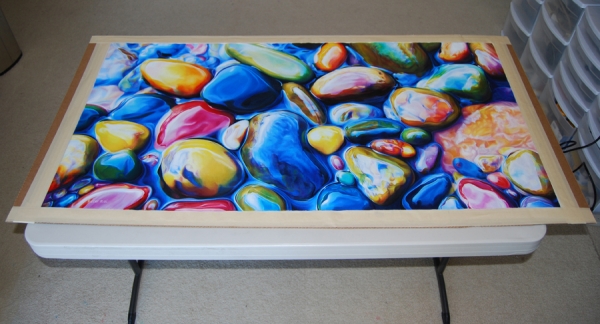
The finished canvas is now taped to a cardboard and ready for spraying.
 

After mounting the canvas on a cradled board, I will then varnish it and frame it.


Report on my San Diego Demonstration

I love those San Diegan CPSA chapter members! They always make me feel welcomed and appreciated.

Everyone was very interested in learning how I work with canvas on the Icarus board. When I rolled out my 24" x 48" canvas in progress I could definitely see their curiosity peaking.

Here are the points I discussed during my presentation:

  • why canvas
  • what type of canvas
  • how to prime it
  • how to mount it and varnish it

Afterwards I demonstrated the three main techniques I use when working with canvas on the Icarus board :

  • mapping the main colors with wax pastels (low temperature)
  • melting and thinning wax pastels (high temperature)
  • developing colors, values and details with colored pencils (medium temperature)

I set up three stations, each with a board at a different temperature, so that a line of attendees could swiftly move through the steps and try the different applications. Unfortunately, after I answered all their questions, there wasn't enough time for everybody to try to replicate the techniques. However, I think they all walked away with a sense of new possibilities.


Demonstration on Canvas and the Icarus Board

Saturday, October 12, I will give a demonstration on how to use canvas on the Icarus Drawing Board. This will take place during the San Diego CPSA District Chapter meeting (10:00 am - 12pm) at the Serra Mesa- Kearny Mesa Library, 9005 Aero Drive, San Diego.

Everybody is welcome! If you're not a member of the Colored Pencil Society, this will be a great opportunity to meet a dedicated group of artists who share a passion for colored pencil. I hope to see you there!


Arlene Steinberg and the Icarus Board

Amazing colored pencil artist and friend, Arlene Steinberg, is featured in the May 2013 issue of The Artist's Magazine along with other talented artists in the article "Colored Pencil Comes of Age" by Maureen Bloomfield.

Bloomfield says: "One reason Steinberg's color is so intense and saturated is that she works on an Icarus Art drawing board, a portable board that has warm and cool areas; the board is placed under the paper, and the wax reacts to the heated part of the surface" (54).

For a preview of this article visit the Artist's Magazine's blog post "Some Like it Hot/Colored Pencil Art Sizzles".

Below is one example of Arlene's brilliant artwork titled "Hibiscus Under Glass".

"Hibiscus Under Glass

Arlene was also featured on the Icarus Art September 2012 Newsletter.

To view more of her art please visit her website: www.arlenesteinberg.com.

Arlene will be one of the workshop instructors at the 2013 Colored Pencil Society Convention, in Brea, California.


“River Pebbles, No. 11”

River Pebbles, No 11

Title: River Pebbles, No. 11

Outline - Cool Zone

The outline was accomplished with Prismacolor Verithin on the cool zone of the Icarus board.

Color Mapping - Warm Zone - Low Temperature

After drawing the outline I proceeded to map the main colors with Neocolor artist crayons on the warm zone of the Icarus board using a low temperature.

For more on color mapping with artist crayons you can view the following videos:

Melting - Warm Zone - High Temperature

With temperature setting at maximum, I melted the artist crayons using clay shapers (also known as color shapers).

For more on melting artist crayons you can view the following videos:

Tools for Melting Artist Crayons

In the picture above you can see the two color shapers I used for melting and the wet sponge for cleaning. For easier cleaning I spray the surface of the wet sponge with a little Simple Green.

Outline - Detail

Color Mapping - Detail

Melting - Detail

Refining - Detail

Refining with Colored Pencil - Medium Temperature

With the temperature set at medium I developed the colors, values and details of the pebbles by layering and blending colored pencils with a variety of tools like tortillions, paper stumps and a Caran d'Ache blender.

Mounted on 2" Thick Clayboard

I finally mounted the canvas on a 2" thick Claybord and painted the sides with acrylic. The artwork is now ready for varnishing.


“River Pebbles, No. 10”

River Pebbles, No. 10


Title: River Pebbles, No. 10

For techniques used in this artwork, please see blog post River Pebbles, No.3 - Melting Artist Crayons


“River Pebbles, No. 9” - Where’s Waldo?

Original Photo Reference

When I look at a reference photo like the one above, the question I always ask myself is: where's Waldo?

Waldo, for an artist like me, is a good composition hidden in the randomness of nature. Even when I'm the one setting up the still life, I try not to interfere in the way pebbles fall into place. I just take many pictures while anticipating the game I will play later on my computer.

Waldo can be elusive at times. I have images taken years ago that never produced a single Waldo. But my ability to "see" is constantly evolving; I know there's a Waldo waiting to be found even in the most hopeless image.

Composition

Meet Waldo! I found him in the center of the image. Now that I have him, I want to show him off but, as you can see, he looks a little drab. Light and color will do magic.

Values

Here's what he looks like in black and white.

Values Adjusted

Much better - Waldo is coming to life. I just lightened the top left quadrant and pushed the overall value contrast.

Colors Adjusted

Now we're talking!

River Pebbles, No. 9

And here is my finished piece - in honor of Waldo of course!

Title: River Pebbles, No. 9

For techniques used in this artwork, please see blog post River Pebbles, No.3 - Melting Artist Crayons


“Poppy, No. 4”

Poppy, No. 4

Title: Poppy, No. 4