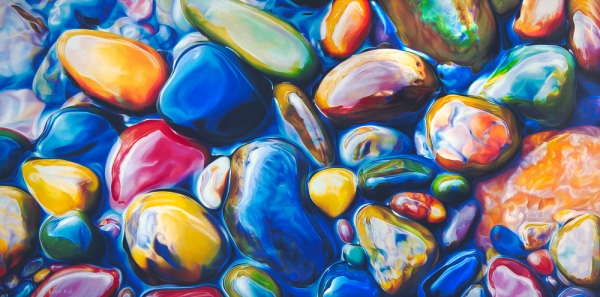
Title: "Unveiled"
Size: 24" x 48"
Medium: Prismacolor Premier, Caran d'Ache Luminance, Derwent Coloursoft, Faber-Castell Polychromos, Caran d'Ache Neocolor I and II, Holbein Oil Pastel
Tools: Tortillions, Paper Stumps and Colour Shapers
Surface: Extra Fine Texture Canvas primed with several coats of clear Art Spectrum Colourfix Supertooth Primer
Technique: Icarus Drawing Board
Presentation: Mounted on a 3/4" Ampersand Claybord, varnished and framed
I'm very proud to have completed this piece, if nothing else for its size alone. It has accompanied me through the trials and triumphs of this past year. It's been a faithful companion even though I neglected it for long spells, at times in favor of other artworks, and later during the long months of my youngest son's illness, surgery and recovery.
It was born out of necessity. I sold its twin brother "In Between", before I had a chance to have it professionally scanned. I had many requests for giclees so I decided to redo it four times its size. Since I was familiar with the subject and technique, I thought I could concentrate on the challenge of working on a much larger scale.
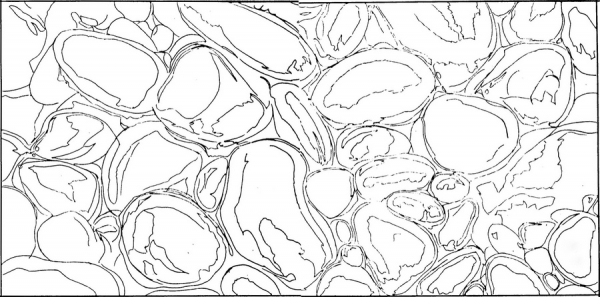
Above is the enlarged drawing I used to trace the outline on the canvas with Verithin colored pencils. I like to use local colors to avoid erasing graphite. On this blog post you can see how I traced it.
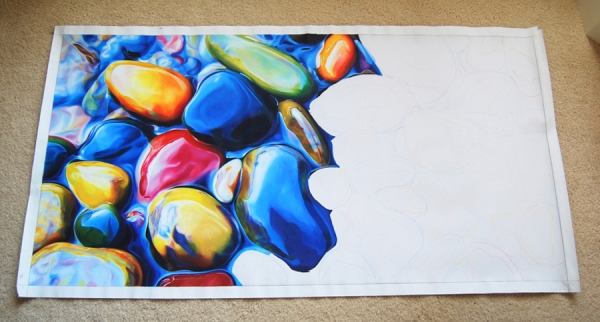
Of course I made some changes along the way. This progress photo shows a large stone on the bottom left corner that I eventually replaced with smaller pebbles. I used an electric eraser to lift most of the pigment and then drew new pebbles on top.
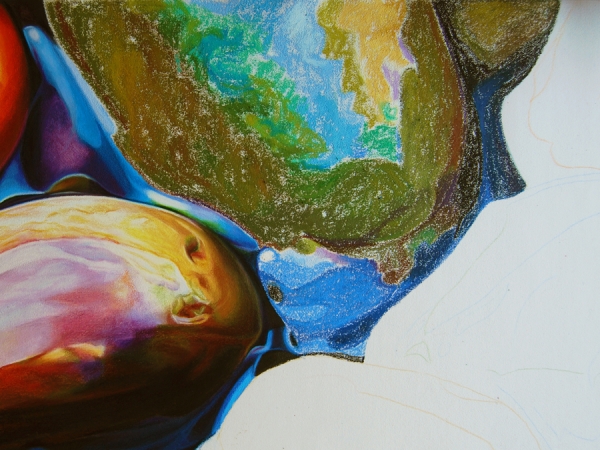
Here I mapped the area with Neocolors and oil pastels. Neocolors are very useful, especially around the edges, because they can be sharpened. Oil pastels come in such a wide selection of colors, I would be limiting my palette if I weren't using them. At this stage I set the temperature of the Icarus board to low.
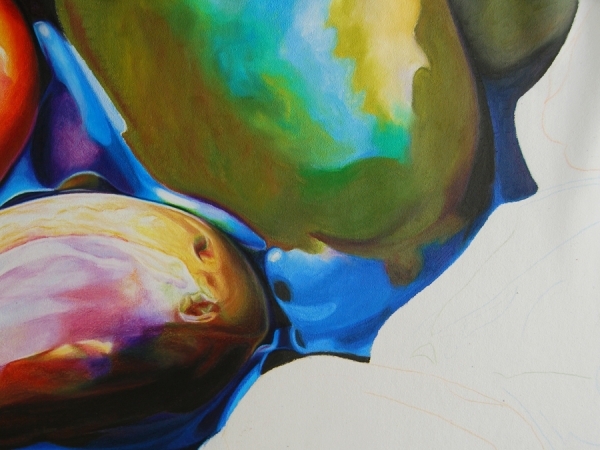
The photo above shows the results of melting the Neocolors and oil pastels. I normally melt at the highest temperature using a colour shaper. Then I blend further and pick up any extra pigment left on the surface with a paper stump. At this point the Colourfix primer's texture has resurfaced again, making the canvas receptive to colored pencils.
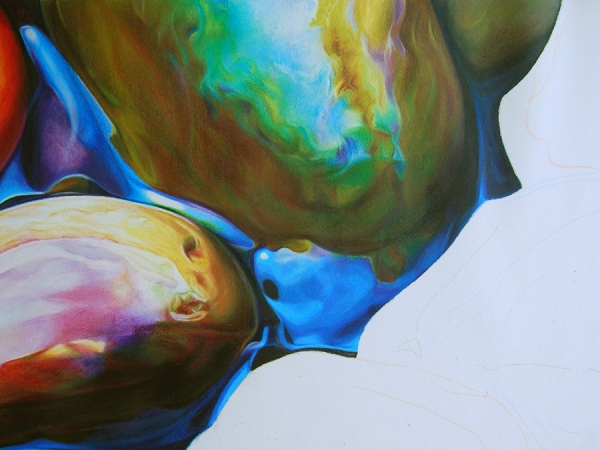
Here you can see how I further developed the colors, values and details using colored pencils, with the board set at medium-low temperature. The perfect tools for blending colored pencils are tortillions and paper stumps.
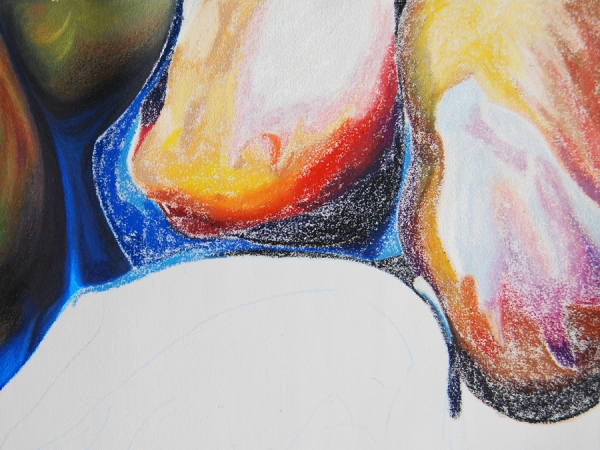
When blocking-in, it's not important to include all color nuances and details. These can be developed later with colored pencils.
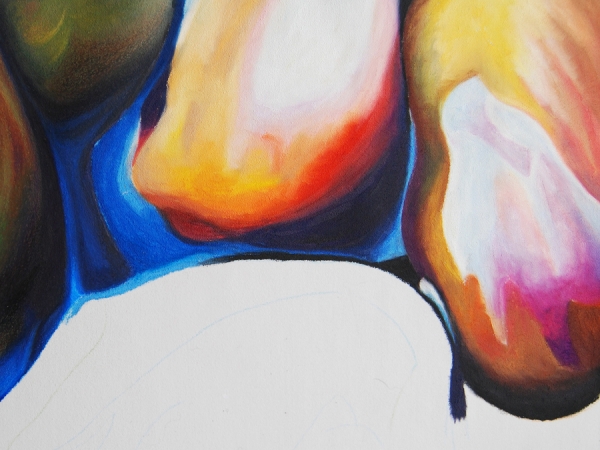
Melting the pigment is probably the most exciting application of this technique. Again, it's not necessary to create perfectly smooth blending at this stage; that's what colored pencils are for.
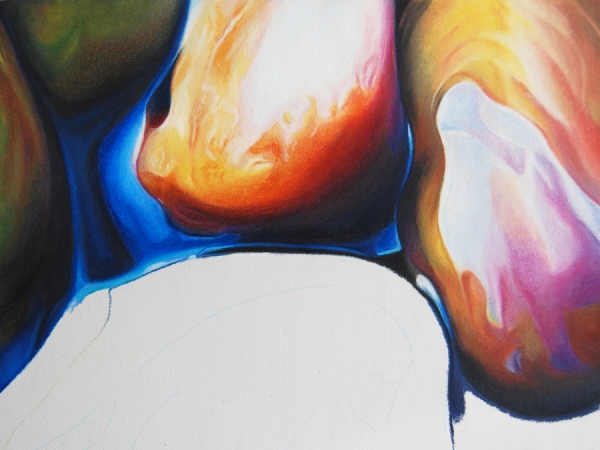
Above is another example of how I developed the colors, values and details using colored pencils.
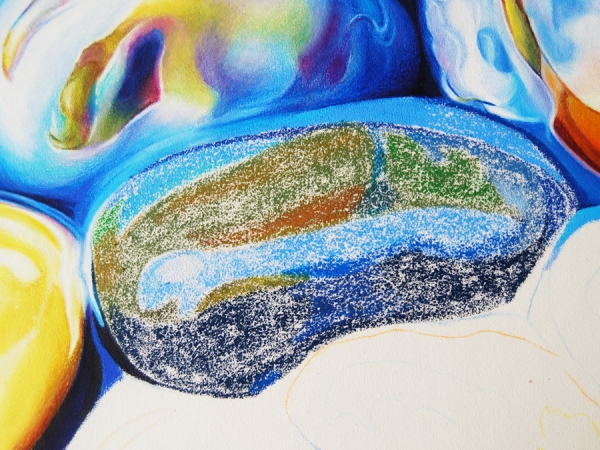
In this third series of close-ups I’d like to talk about how to speed up the process. Mapping with Neocolors and oil pastels is much quicker than mapping with colored pencil. Some of these rocks can measure up to 12 square inches or more!
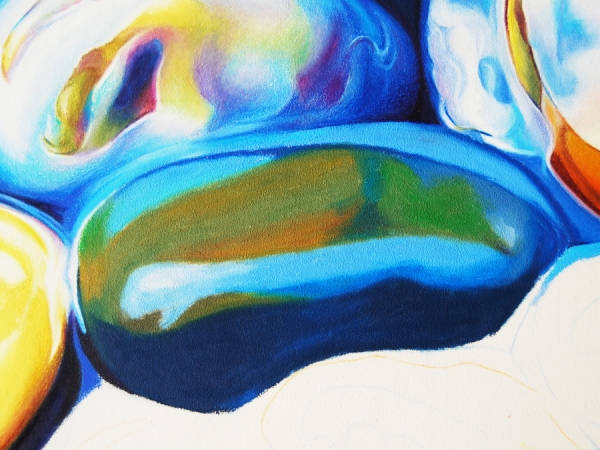
Melting the waxy pigments is a very effective technique for fast coverage of the canvas surface. It compares to dissolving water-soluble Neocolors with a brush, except there’s no color or value change with heat.
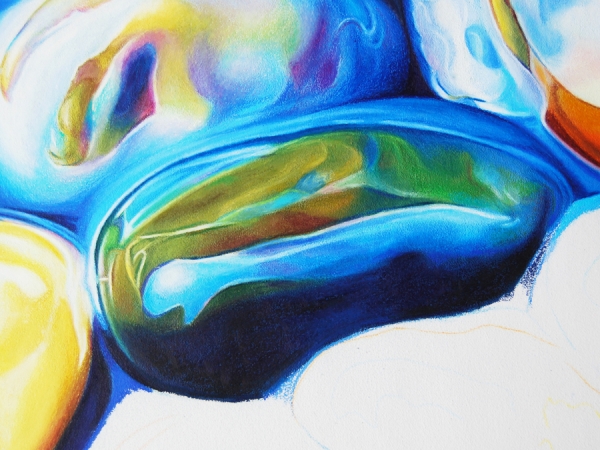
Another valuable time-saving technique is adding all the details at the end. Highlights are time consuming if you need to account for them from the beginning. I created all the thin highlights by subtracting the pigment with a Verithin white pencil and by going over with a softer pencil or with a sharp, white Neocolor.
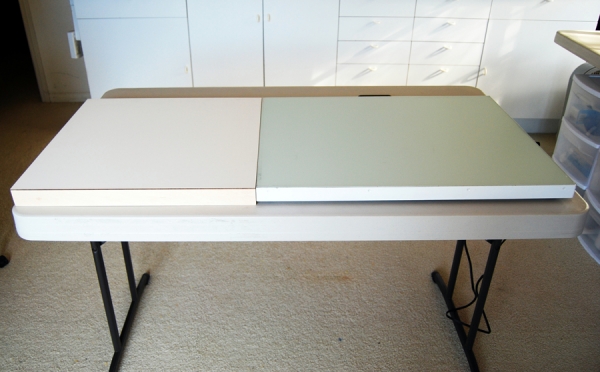
In the photo above I’m showing how I devised an easier way to work with a large canvas. I placed a 20” x 20” claybord, 2” thick, along the side of the Icarus board, thus creating a larger surface for the canvas to rest on.
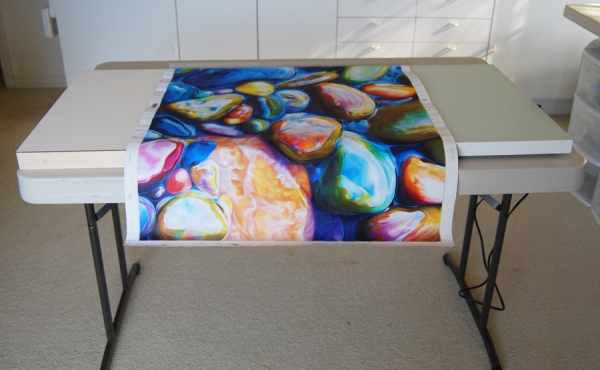
What’s appealing to me about working on canvas versus paper is that I don’t have to worry about creasing or bending it. Canvas is very flexible and can take a lot of abuse.
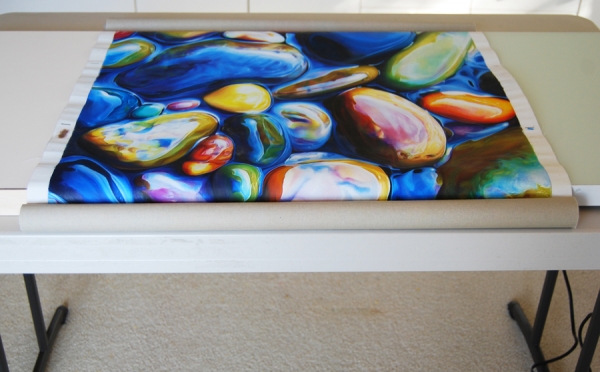
I like to roll up my canvas so that it doesn’t hang over my knees. I use two binder clips to keep the canvas from unrolling.
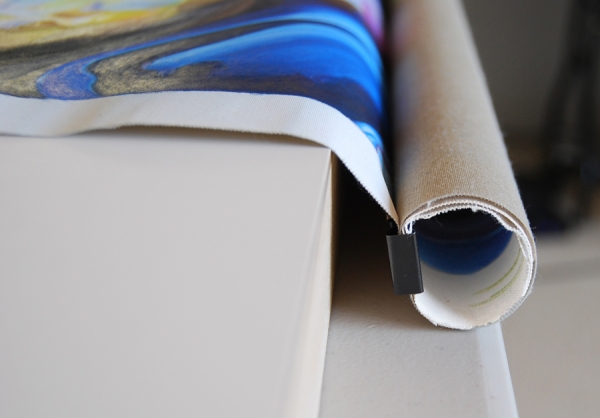
Here is a close-up of the canvas fastened with binder clips.
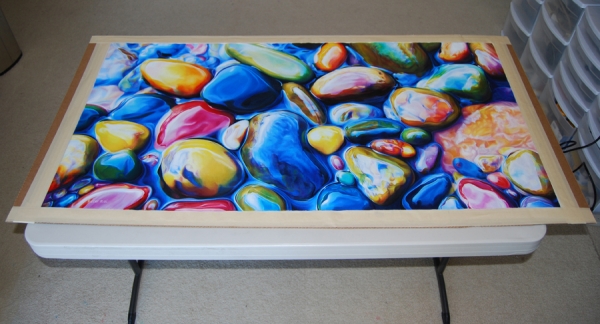
The finished canvas is now taped to a cardboard and ready for spraying.
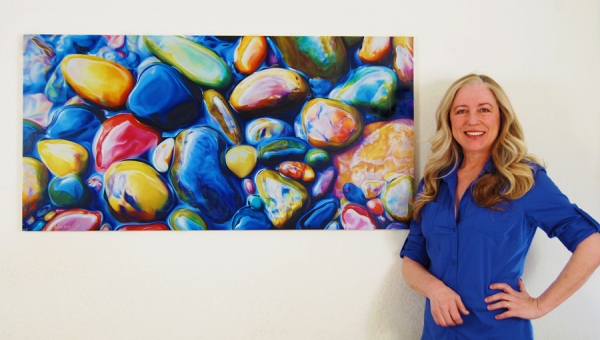
After mounting the canvas on a cradled board, I will then varnish it and frame it.

12 comments
Jill
November 29, 2013
Thanks so much for this peek into how you do this particular drawing, l like it a lot. :)
Ester Roi
November 30, 2013
My pleasure, Jill, and thank you! :)
Hugh McGuire
November 30, 2013
Thank you Ester for showing us exactly what you are doing. Thanks also for the list of materials and tools. The Blue Jay in a Sycamore tree that I am slowly working on is the first time I have added a little Prismacolor Pastels to the Prismacolor Premier and Verithin. I like it and will do more, I hope. You deserve a lot of credit for your willingness to help others along. You are modest and unpretentious. In another field I have run into those who held all their cards close to their vests - so to speak -, were unwilling to let others see how things are done and acted as if they were the king or queen of their field. That’s not you, thank God. You are incredibly talented and blessed. Keep up the superb work.
P.S. When I finish the piece I’m working on I’ll post it or email it to you. I’m doing that also for Bob Burns who shot the reference photo.
Flynn Gentry Taylor
December 02, 2014
And here I am over a year later in December 2014 agreeing with Hugh McGuire’s assessment of you Ester. Thank you for all your help with my questions now that I have received my Icarus Painting Board…I feel so excited to take this journey bolstered by all the information you have so generously made available. Thank you for sharing! Hopefully one day I will share a piece of my work with you also.
Ester Roi
December 02, 2014
My pleasure and thank you, Flynn! :)
Ester Roi
November 30, 2013
Dear Hugh, your comment is so uplifting and very much appreciated! Sharing what I know is my mission which brings me a deep satisfaction, especially when I receive the confirmation that someone finds it useful. I’m looking forward to see your finished piece – I know it will be superb.
Blessings!
Juliet Aucreman
November 30, 2013
Gorgeous and inspiring - always!
Ester Roi
December 01, 2013
Thank you, Juliet!
Maxine Blackwell
December 02, 2013
Beautiful, as always. Thank you so much for sharing your technique and allowing us to benefit from your trial and error. You give so unselfishly of yourself to the art and colored pencil community and we are very grateful for the years of patient instruction you have given through your artwork and on your website. Again, thank you for the insight and the new and exciting art work that “Unveiled” will inspire in those of us who have fallen in love with the painting. I can hardly wait to try my pencils on canvas with my tried and true Icarus Board! God bless you for your generosity, kindness and incredible talent.
Ester Roi
December 03, 2013
Thank you, Maxine! You’re so kind! It’s feedback like yours that keeps me going and gives meaning to what I do. God bless you too!
PinaColada
March 01, 2014
Wow, this is absolutely stunning - fabulous work and thank you for taking the time to explain step by step how you got there - what eye candy! :)
Ester Roi
March 02, 2014
It’s a pleasure, Pinacolada, and thank YOU! :)