As a final varnish I use Golden Polymer Varnish with UVLS ((UltraViolet Light Stabilizers). I prefer the gloss type because it really brings out the colors in a painting. It makes the surface shiny which works great with my subject.
This is a waterborne acrylic polymer varnish that dries to a protective, flexible, dust-resistant surface. I always thin it with water, 3 part varnish to 1 part water. For this artwork I applied nine coats, waiting 3 hours between coats. The varnish cures completely in one week.
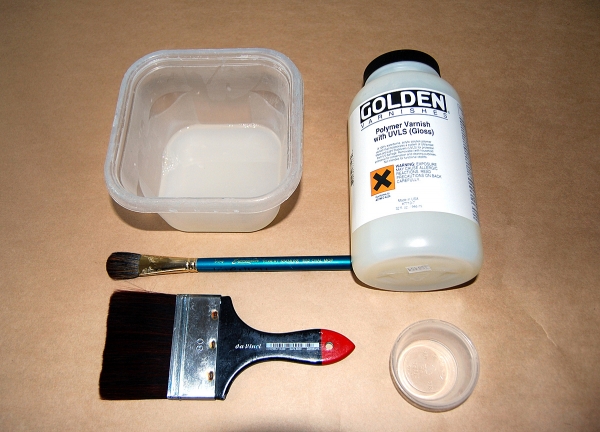
Here you can see my varnishing tools:
- a wide, great quality brush for the top surface
- a smaller one for the sides
- a plastic container for the varnish
- a measuring cup for mixing varnish and water
I work in a dust free room and place the painting on top of boxes to elevate it from the table. I alternate between horizontal strokes in one session and vertical ones in the next.
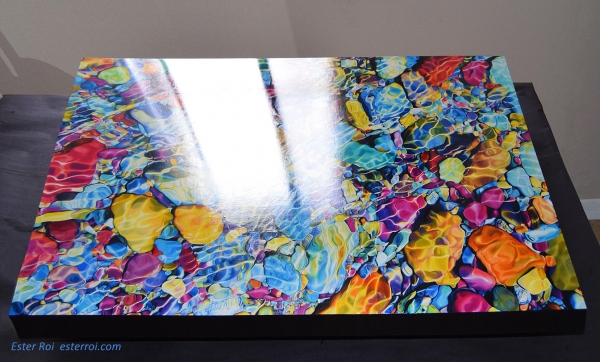
My varnished artwork (upside down) by a window after been sealed with 12 layers of Golden Archival Spray Varnish and nine coats of Golden Polymer Varnish.
I feel very confident to frame my art without glass. I've verified on my own that the UV protection these varnishes provide is outstanding. I did a rigorous lightfastness test using the Blue Wool Reference cards and following strict ASTM standards. Even the pigments with the lowest lightfastness ratings performed amazingly well when protected by these varnishes.
On my next and final post in this series I will talk about framing.
Step 1: before varnishing
Step 2: sealing the artwork
Step 3: mounting the artwork on a panel
Step 4: digital capture of the artwork
Step 5: applying the final varnish
Step 6: framing the artwork