
Title: River Pebbles, No. 12
- Size: 6" x 6"
- Medium: Prismacolor Premier Colored Pencils (Verithin and Softcore), Caran d'Ache Luminance Colored Pencils
- Tools: Tortillions, Paper Stumps
- Surface: Extra Fine Texture Canvas primed with several coats of clear Art Spectrum Colourfix Primer
- Technique: Icarus Drawing Board
- Mounted on a 6" x 6" x 2" Ampersand Claybord and varnished
- To see how I mount and varnish my artwork, please refer to my post on Glassless Framing.
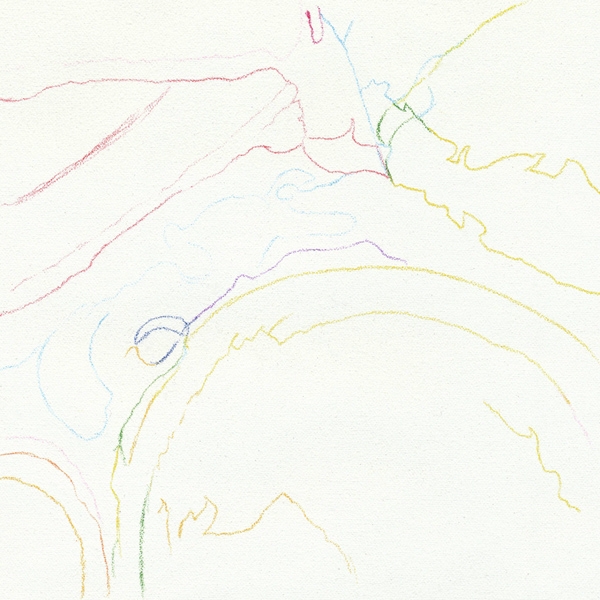
The outline was accomplished with Prismacolor Verithin on the cool zone of the Icarus board.
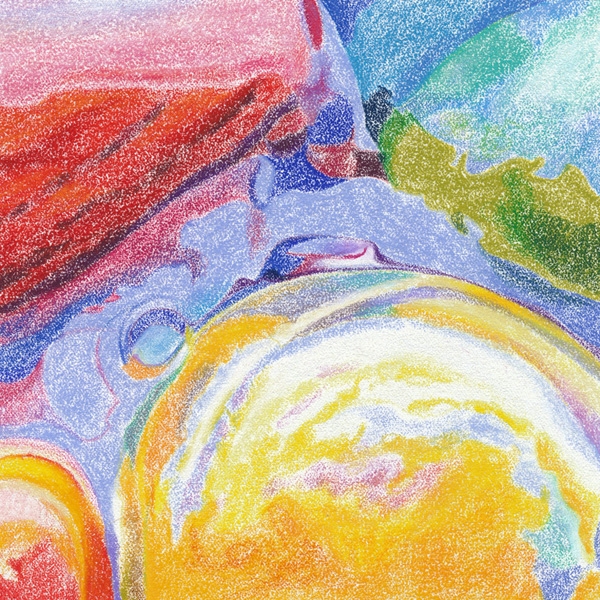
In this step I blocked-in the main colors on the warm zone with very low heat, just enough to soften the waxy pigments.
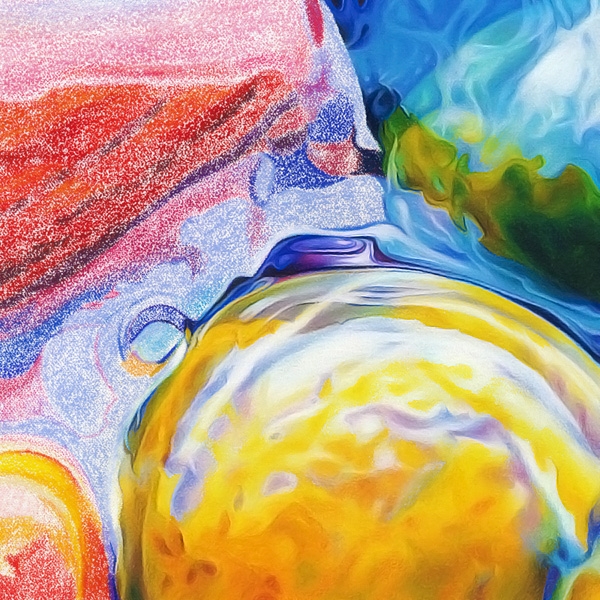
After setting the temperature control at medium, I began adding pigment until the canvas was completely covered. I then blended the colors with a tortillon or a paper stump.
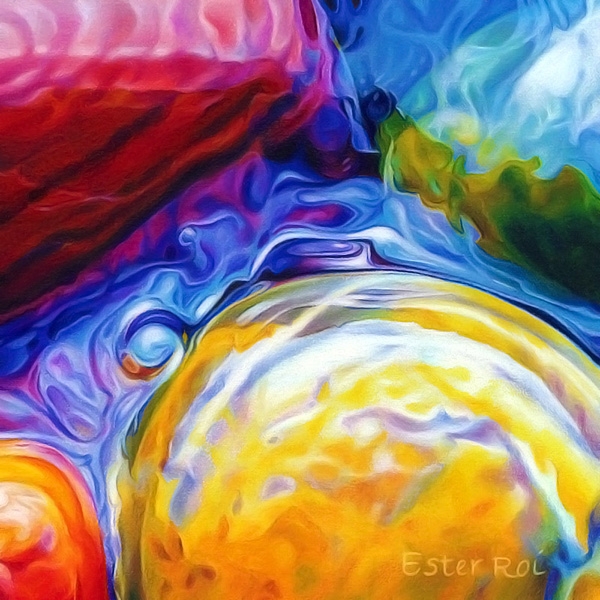
I really enjoyed this piece. However, now that it's finished, I wish I made it larger. The swirls of colors would have looked even better on a 12" x 12". It probably would have taken me the same amount of time had I incorporated wax pastels (Neocolors).
I just mounted the canvas on a 6" x 6" x 2" Claybord. Soon I can varnish it, photograph it, and put it for sale on my website.
18 comments
Barbara Rogers
February 09, 2014
Hi Ester,
The pigment looks a lot like wet paint when it’s applied to canvas—very interesting. :) (lesson learned)
Ester Roi
February 09, 2014
Yes, it does, Barbara! The more pigment applied on the canvas, the easier it is to blend. :)
Terry Rempel-Mroz
February 09, 2014
This is beautiful. I love that you are willing to share the stages - makes the painting even more meaningful, as I feel part of the creation. Brava!
Ester Roi
February 09, 2014
Aww, thank you, Terry! I really enjoyed sharing the steps! :)
LynnRank
February 09, 2014
What depth!!....That is amazing. I was thinking it was much bigger until I read the size? Really, 6 inches????
Ester Roi
February 09, 2014
Thank you! So small, isn’t it, Lynn? I still think I should have made it larger though. :)
Julie Podstolski
February 09, 2014
I love to see how you work. Visual magic!!
Ester Roi
February 09, 2014
Thank you, Julie! And I love to share how I do it! :)
Lynn Rank
February 09, 2014
Ester, did the Colour Spectrum clear you used have a tooth….....?
Ester Roi
February 09, 2014
Yes, it does! The tooth helps with putting down a lot of pigment. The more pigment, the easier it is to blend. :)
Linda Mahoney
February 11, 2014
Thanks for posting this, Ester! I’m working on a piece right now on Stonehenge and hoping I will get this technique down. I was starting to think I need to get the pigment on thicker & after seeing this, I’m pretty sure that’s been part of my problem.
Ester Roi
February 12, 2014
Yes, Linda, the thicker the pigment the more effective the heat will be. :)
Juliet Aucreman
June 01, 2014
Always mesmerizing!
Ester Roi
June 01, 2014
Aww, thank you, Juliet! :)
Clare
June 16, 2014
It’s very interesting to see how you achieve such realism, thank you for sharing your process!
Ester Roi
June 17, 2014
My pleasure, Clare! :)
Mary Ann Bednar
September 28, 2019
I am so new with this process so I am not sure how to do what you do to make the color look so smooth. I used to do Encaustic and am familiar with the heat gun process but I am not sure exactly how to put so much paiint on the paper to get that smooth look, just like painting with oil or acrylic with a brush. I guess I have to be patient so I can work it out myself. Thank you for sharing.
Ester Roi
September 30, 2019
Before you attempt a new artwork, I suggest you try to experiment with different papers and temperatures. Sanded pastel papers, like the ones I mentioned on my email, can help you grab on to more pigment.