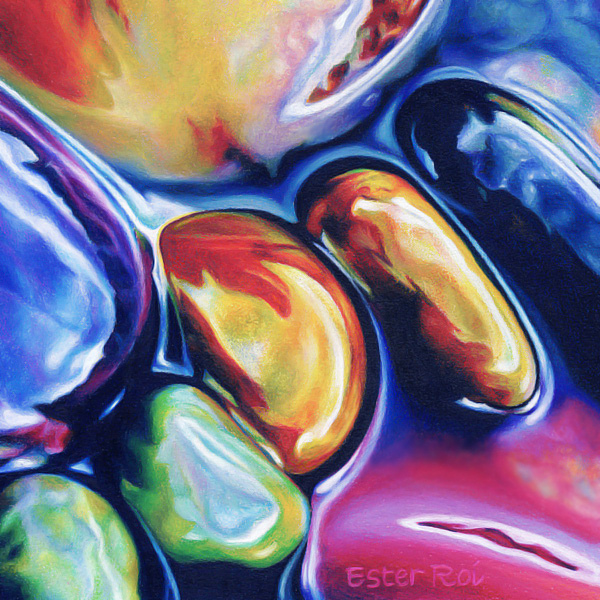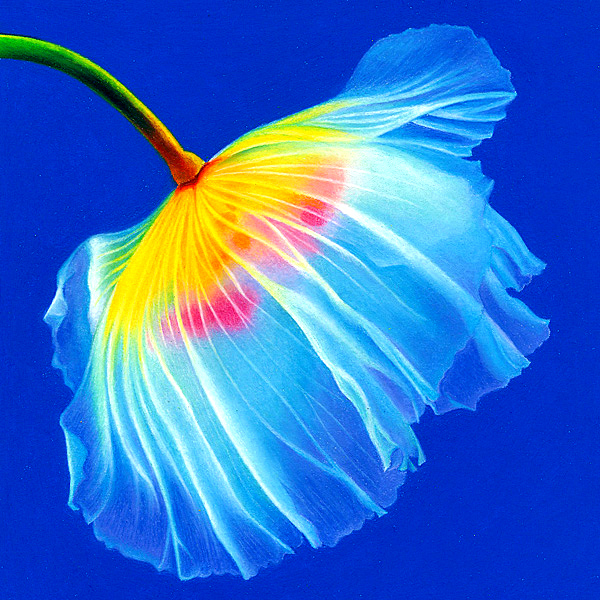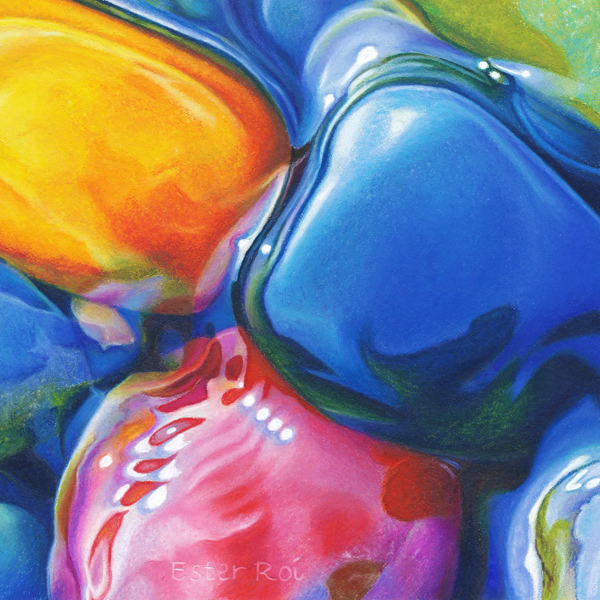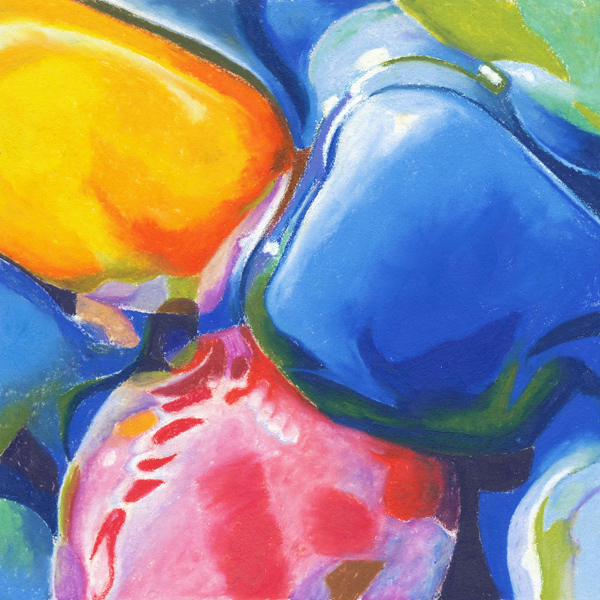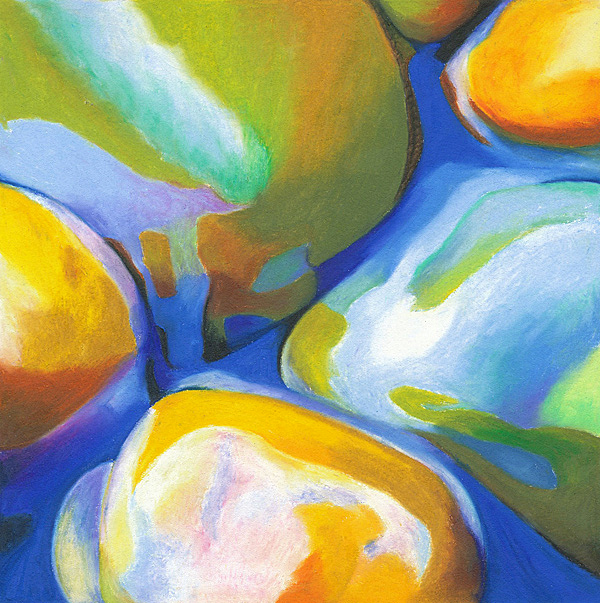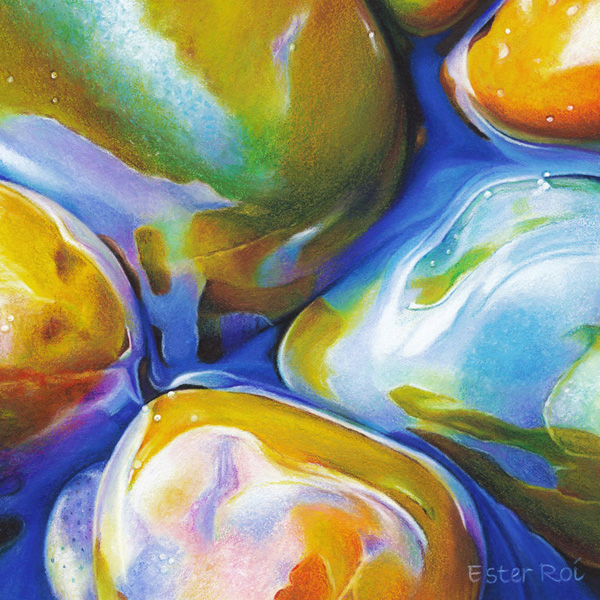
Title: River Pebbles, No. 7
- Size: 5" x 5"
- Medium: Prismacolor Premier Colored Pencils (Verithin and Softcore), Caran d'Ache Luminance Colored Pencils, Faber-Castell Polychromos Colored Pencils, Derwent Coloursoft Colored Pencils
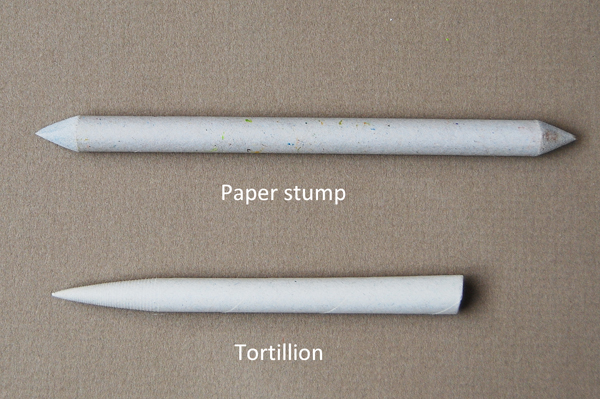
- Miscellaneous: Prismacolor Colorless Blender, Derwent Blender, Tortillions & Paper Stumps
- Surface: Fabriano Artistico Extra White, Hot Press, 300 LB - primed with a thin coat of clear Colourfix Primer
- Technique: Icarus Drawing Board
- Mounted on a 5" x 5" Ampersand Claybord (1/8" thick) and framed.
- To see how I mount and varnish my artwork, please refer to my post on Glassless Framing.
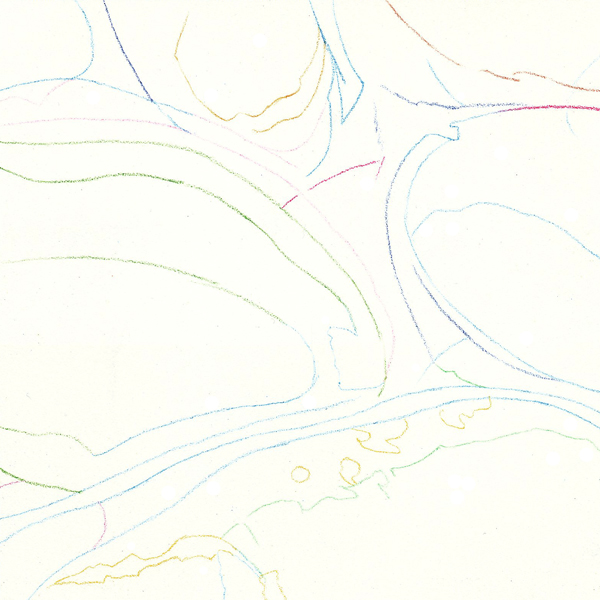
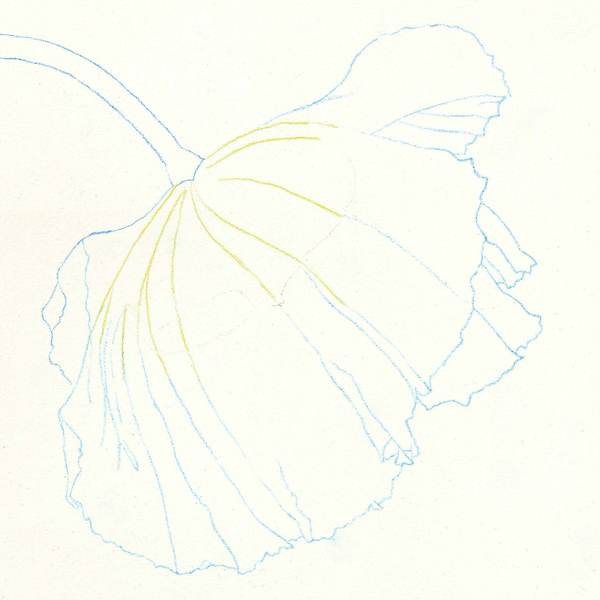
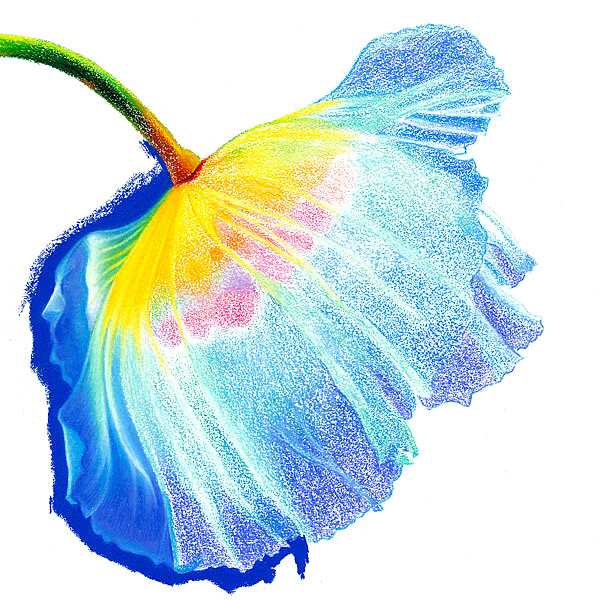
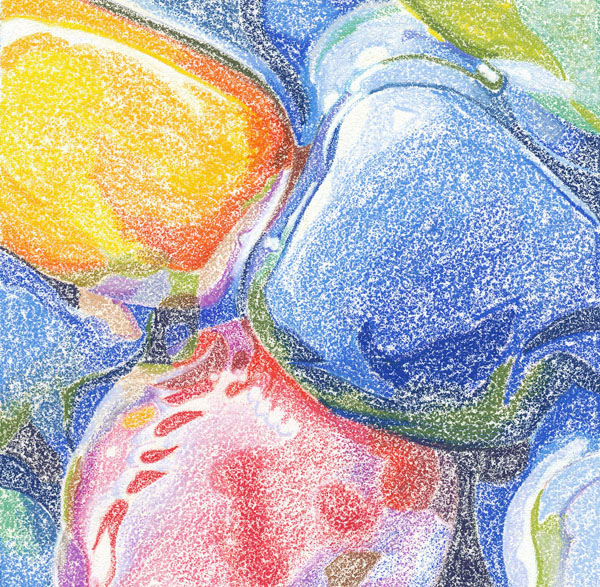
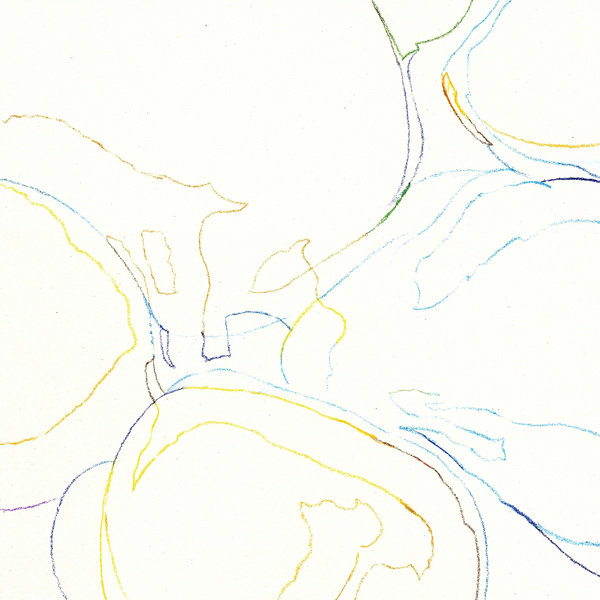
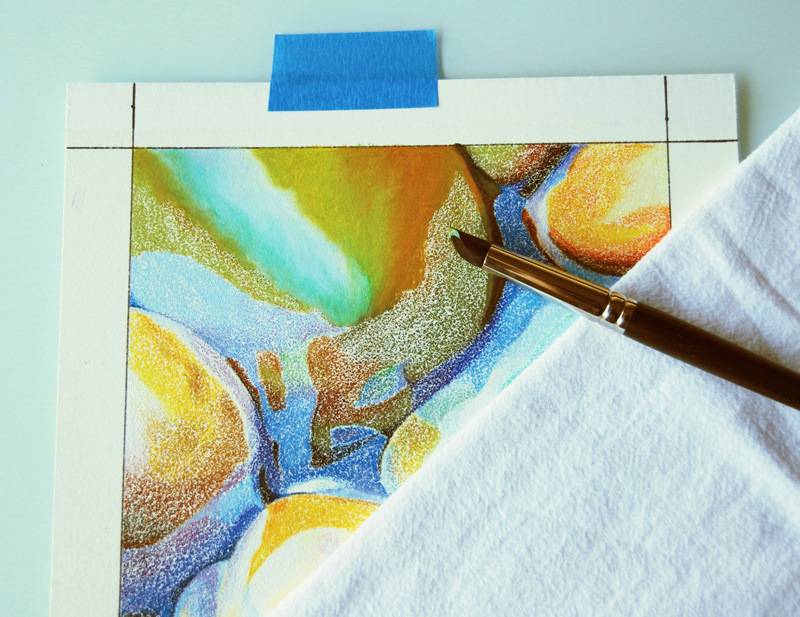
The outline was accomplished with Prismacolor Verithin on the cool zone of the Icarus board.
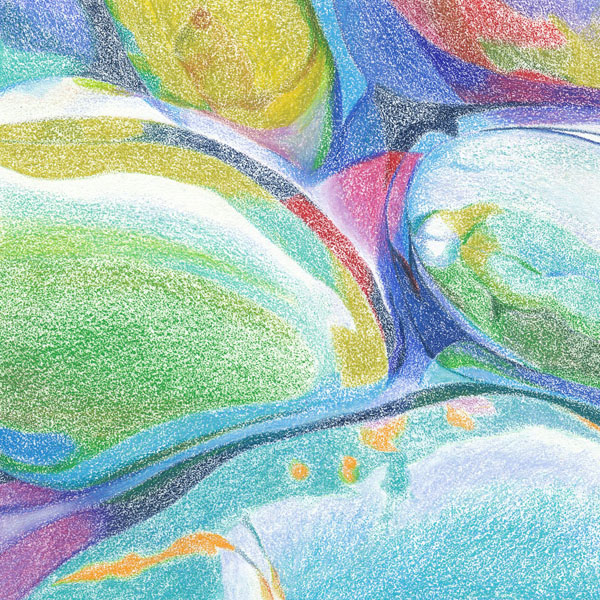
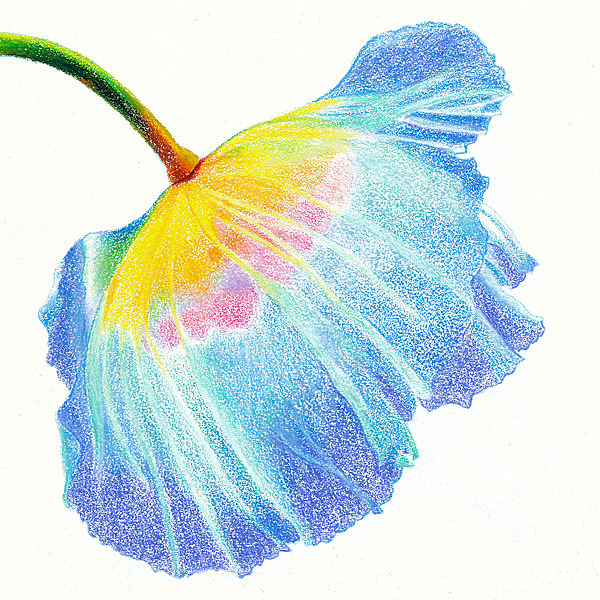
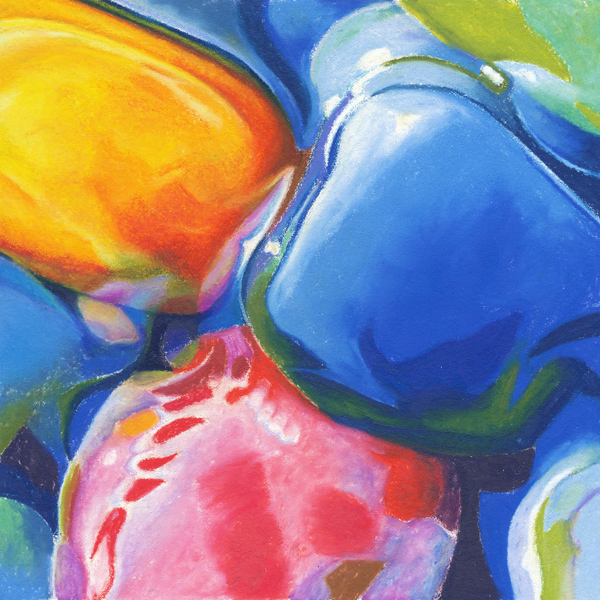
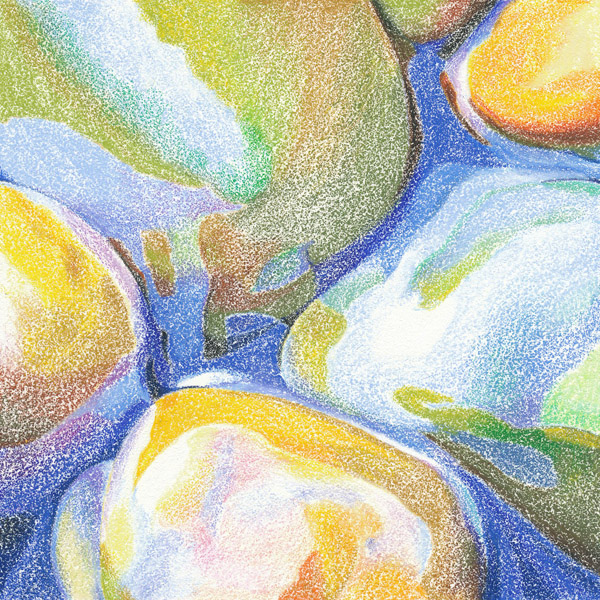
In this step I blocked-in the main colors on the warm zone with very low heat, just enough to soften the waxy pigments without melting them or blending them.
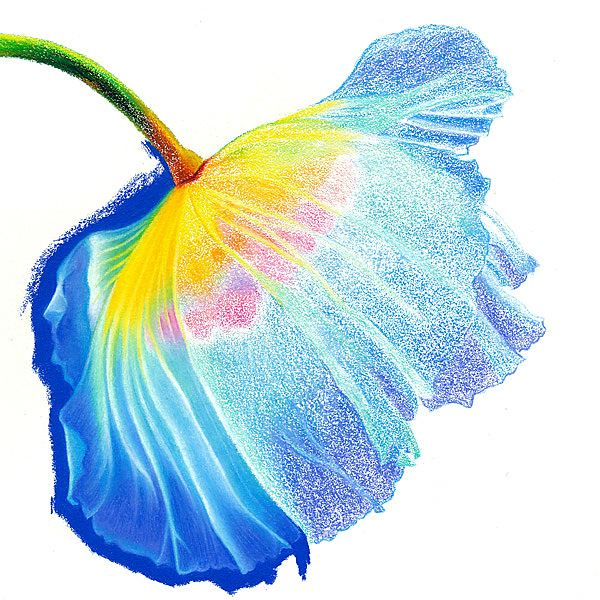
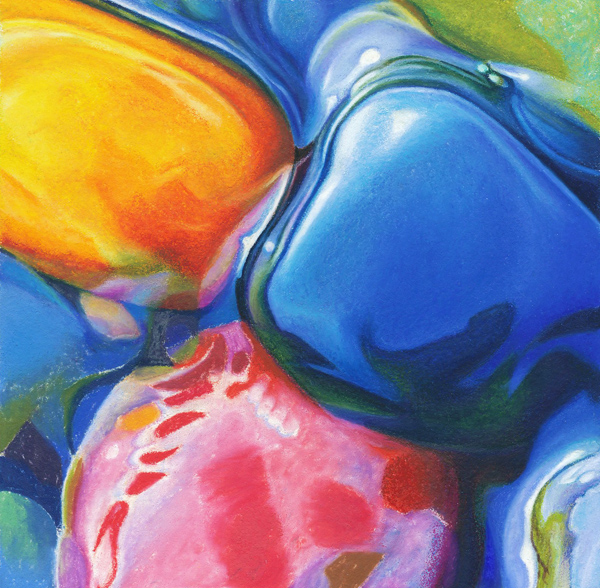
After setting the temperature control at medium, I added additional color until there was enough pigment to obliterate the paper. Then I began blending using the point of a tortillon or the side of a paper stump with a very light touch.
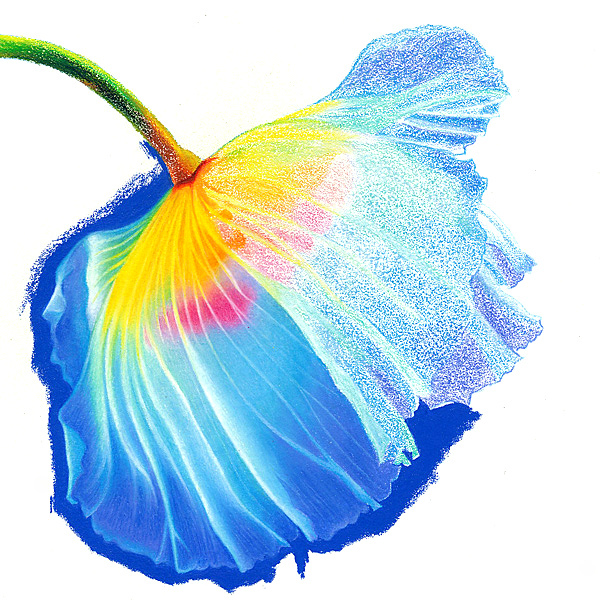
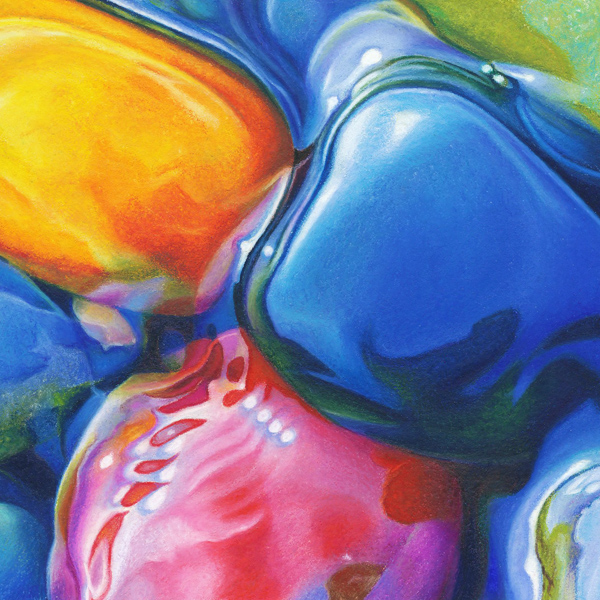
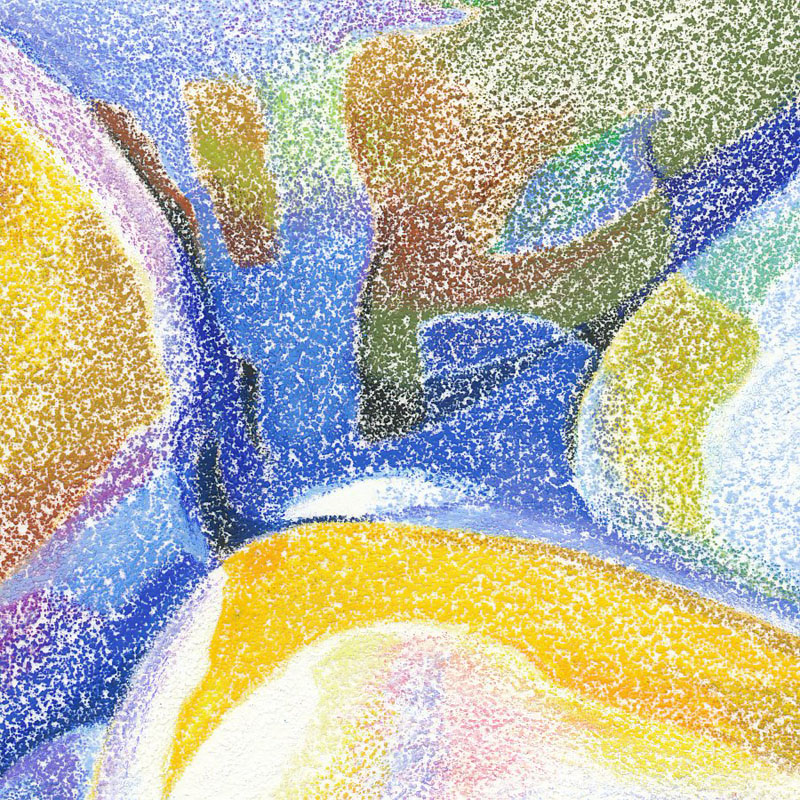
Colorless blenders were used to soften edges and details.