I'm experimenting with canvas and mixed media using the Icarus Drawing Board.
I purchased a few yards of primed cotton canvas (very inexpensive) from my local art supply store .
Then I cut a piece of canvas about an inch wider on each side than the final size (artwork will be 16" x 24", canvas is 18" x 26").
I enlarged my original graphite drawing with this free program: PosteRazor. I love this make-your-own-poster program!
After assembling the poster together, I taped it to the canvas. I then traced the drawing with colored pencils using a light box. I extended the drawing a quarter inch all around (16.5" x 24.5") to account for possible misalignment during mounting. Yes, I will eventually mount the canvas on a cradled board.
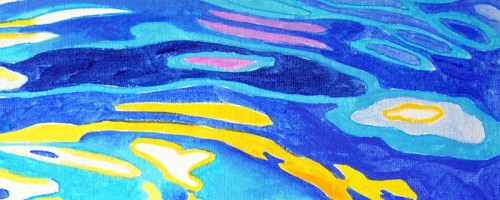
Finally I blocked-in the colors using acrylic paint. I wasn't very meticulous in this phase because I knew I would develop a second layer with colored pencils. However I made sure to cover the whole canvas with paint, even the white areas.
In the example below, you can see a close-up of the first layer (this section is about 3" x 9"). Of course there's no need for heat when painting in acrylic unless you want it to dry even quicker.
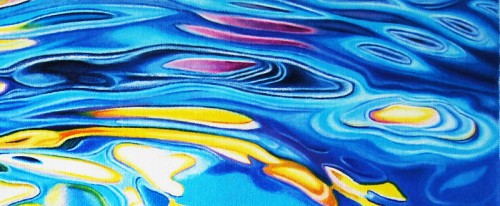
The second and final layer was accomplished on the Icarus board with wax-based colored pencils using medium heat. See image below.
The colored pencils blended effortlessly on the warm canvas. I was also surprised that I was able to obtain pretty fine details in relation to the size of the artwork.
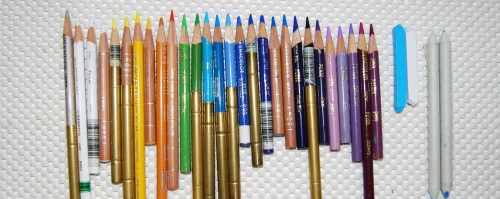
In the picture below you can see what colored pencils and tools I've been using so far.
I'm really having fun with this project but I don't know how it's going to turn out yet. I will post the finished artwork in about two weeks. I'm sure I'll be able to share a lot more about the experience of working with canvas on the Icarus board.
For more on "Canvas and the Icarus Board" please click on the following links:


21 comments
Hazen Folse
August 09, 2011
I love the fact that you are always stretching and experimenting. Good for you, you have no fear, just a marvelous sense of adventure. I admire you so much for your ceaseless creativity.
Hazen Folse
Ester Roi
August 09, 2011
You are so kind, Hazen. I really appreciate it.
Richard Klekociuk
August 09, 2011
Great idea, Ester. Experimentation is the key to keeping one’s work fresh.
Looking forward to the finished work.
Regards, Richard
Ester Roi
August 09, 2011
Thank you, Richard, so nice of you to visit. I couldn’t agree with you more.
Jill
August 09, 2011
This looks great so far! I love the mix of paint and pencils. Such vibrancy in the colors as well.
Ester Roi
August 09, 2011
Hi Jill, thank you for visiting. I appreciate your comment.
Ines
August 09, 2011
Wow, that looks so amazing, I see I can’t get out of ordering an Icarus..
Thank you for effecting such seductive experiments.
Terry Rempel-Mroz
August 09, 2011
This is a wonderful idea! I’m eagerly awaitng the outcome. Question - how did the acrylic layer react to the heat? Did it stretch or become soft?
This is so cool, Ester.
Ester Roi
August 09, 2011
You are welcome, Ines. As you can see, I’m having a lot of fun.
Ester Roi
August 09, 2011
Thank you, Terry. I was surprised at what little impact heat had on acrylic. Even at the highest temperature it maintained so well that I could easily layer a hard colored pencil on top. Perhaps it became a bit softer but not enough to affect the colored pencil layering. After it cooled down it went right back to its normal consistency.
Cynthia Mazzaferro
August 09, 2011
Hey another way to make our medium look like a canvas. Interesting. Wasn’t the canvas material bumpy for the c pencils or did acrylic paint take away the nubbiness?
Ester Roi
August 09, 2011
Hi Cindy, this canvas has much of the texture left - the acrylic layer is thin. I have more experimenting to do but I have a good feeling about it.
Teresa Mallen
August 15, 2011
I have wondered if you had every tried using canvas over the board. I have used acrylic on canvas followed by cps and found it to work quite well. I wasn’t using your board but I can see how the heat would help with applying the cp pigment. Oh the fun of experimenting! :-) Look forward to seeing more…
Ester Roi
August 15, 2011
Hi Teresa, I’m taking my time with this project because I’m experimenting on the side a lot. I found several useful tricks and I will share them as soon as I’m finished. Thanks for stopping by.
Debbi Friedman
September 09, 2011
Very interesting to follow this experiment, Ester. I really love seeing the difference in the stages from one to two. How did your rock photo trip turn out?
Ester Roi
September 10, 2011
I should be finished with this project soon; it’s been really interesting and I’m eager to share the results.
The Snake River trip was great. I have hundreds of new images - I can’t wait to start a new series of river rocks.
Canvas and the Icarus Board: Part 2 | Ester Roi
September 19, 2011
[...] If you need to refresh your memory, you can review the first blog post here: Canvas and the Icarus Board. [...]
Canvas and the Icarus Board: Final Post | Ester Ro
October 08, 2011
[...] Canvas and the Icarus Board Canvas and the Icarus Board: Part 2 [...]
Glassless Framing | Ester Roi's Website and B
October 08, 2011
[...] Canvas and the Icarus Board Canvas and the Icarus Board: Part 2 Canvas and the Icarus Board: Final Post Trackback12 comments on this post. [...]
Nancy Pingree Hoover
September 24, 2013
Hey Ester, nice article! May I ask which pencil extenders you use and where you get them from?
Ester Roi
October 01, 2013
Hi Nancy, sorry for the delay in answering your question. I’ve had a problem with my new blog and I’m now sifting through the spam where all my comments are. These pencil extenders are just great! An artist friend on mine made them for me and published the “how to” on one of Ann Kullberg’s CP Magazine issue. I just wish I knew which one! If I find it I’ll let you know immediately. :)