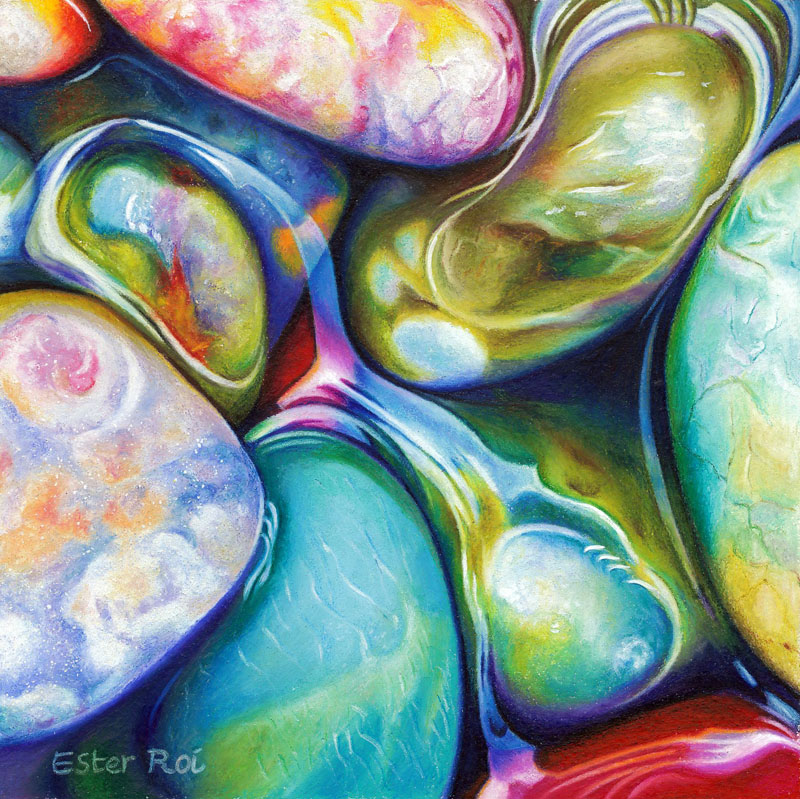
Last week I introduced the first finished project of my new "small art series". This week I'm giving you a closer look.
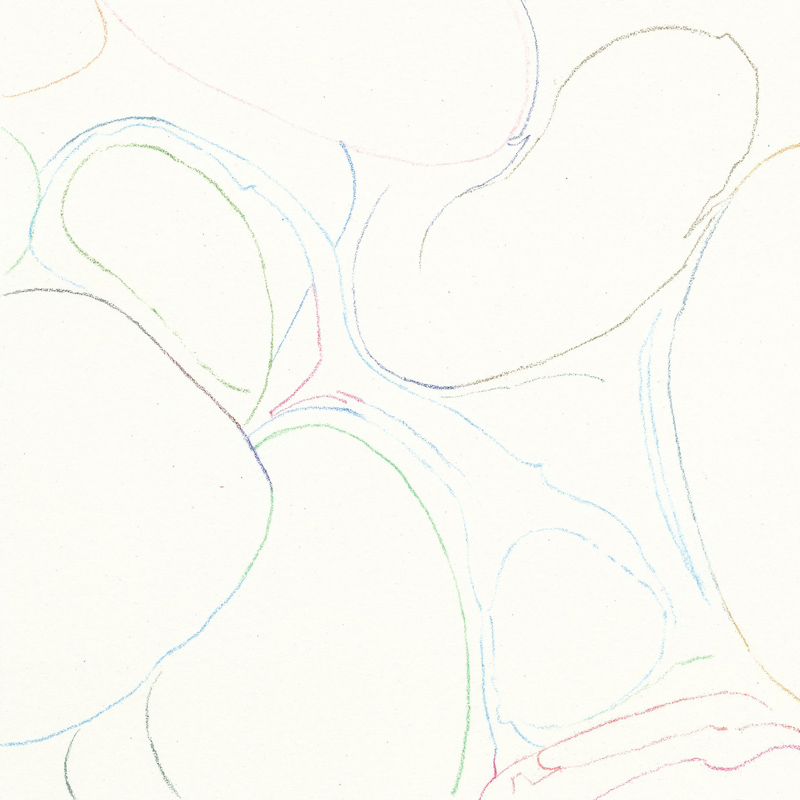
The outline was accomplished with Prismacolor Premier Verithin Colored Pencils on Art Spectrum Colourfix Supertooth Board. This is a very "toothy" surface without the gritty sandpaper feel. Supertooth Boards are made by coating a 500 gms acid-free, archival watercolor paper with a clear acrylic primer mixed with a blend of silica particles.
I have several large sheets of Supertooth and I was able to easily cut one down to the size I needed with an x-acto knife. I noticed that the texture is somewhat variable from sheet to sheet. Next time I will buy the Supertooth primer instead - it's a lot less expensive and will give me more control on the final texture.
"River Pebbles, No. 1" will be mounted on a 6" x 6" Ampersand Claybord with a 2" cradle.
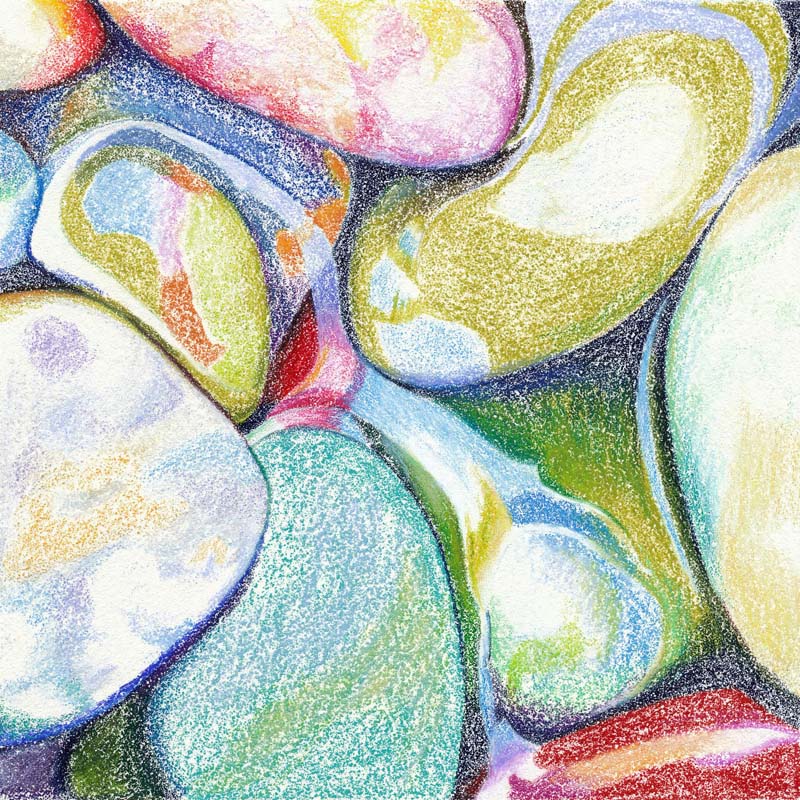
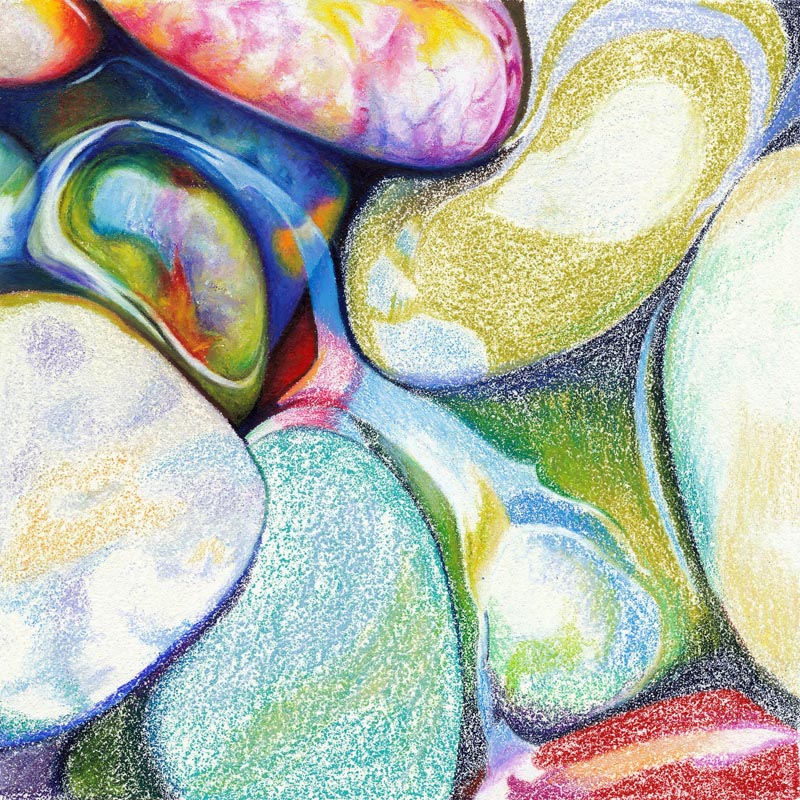
In this step I'm blocking-in the main colors of the pebbles. I'm working fairly fast on the cool zone of the Icarus board (no heat yet) and I'm using Prismacolor Premier Soft Core and Caran d'Ache Luminance colored pencils. It's not important to be precise and detailed in this phase.
After turning on my Icarus board (maximum temperature) I'm focusing on building up enough pigment so that the white of the paper is completely obliterated. I've learned to not be afraid of this step - I know by experience that the more pigment is on the paper, the more malleable and workable the pigment becomes.
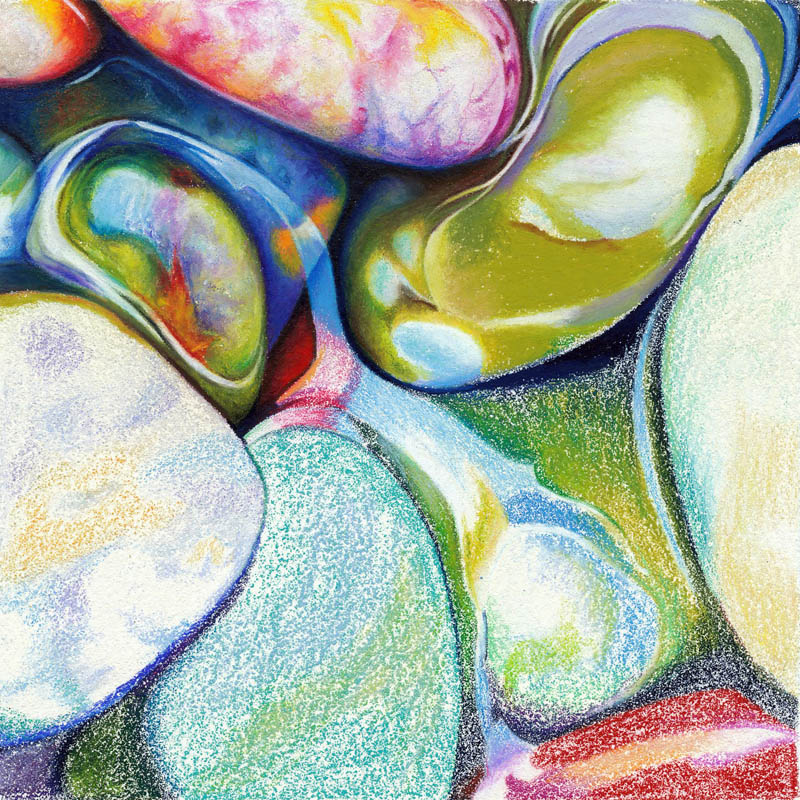

As you can see from the images above, each pebble gets one or two passages on the warm zone. Most of the times I blend the pigments together without tools - on the large areas I've used a paper stump.
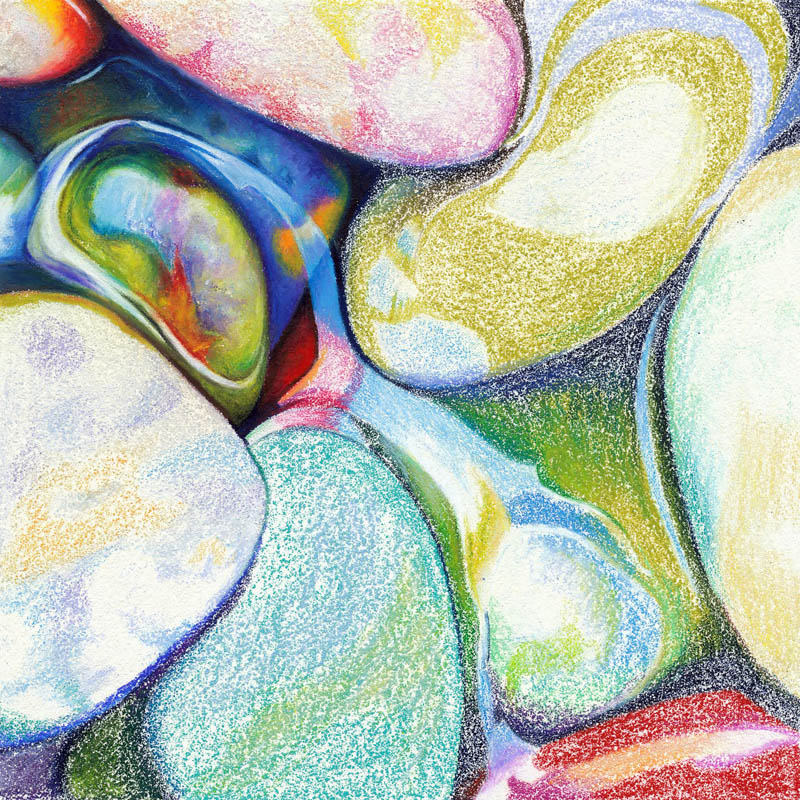
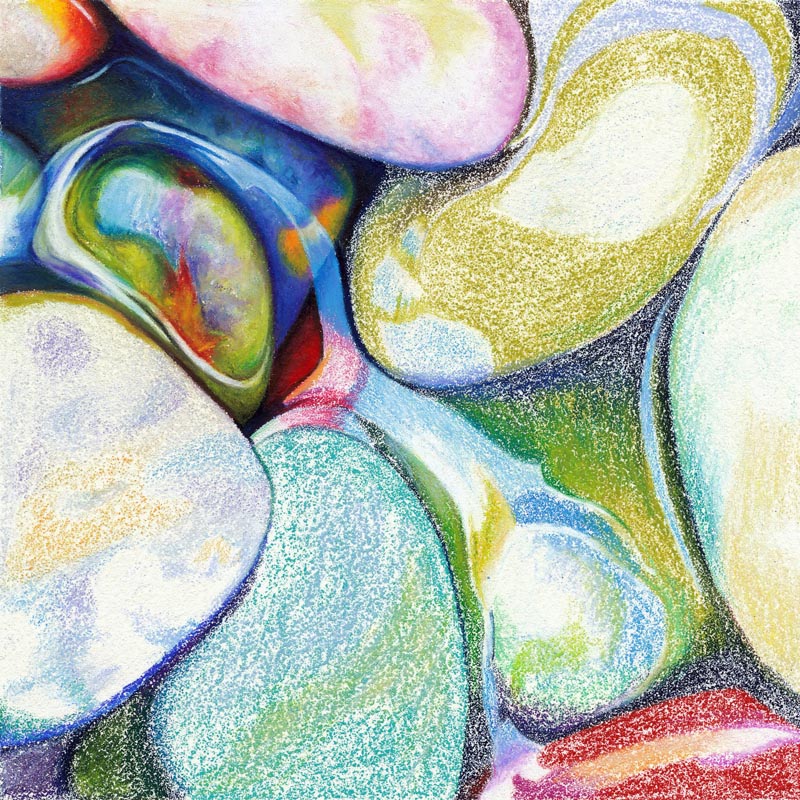
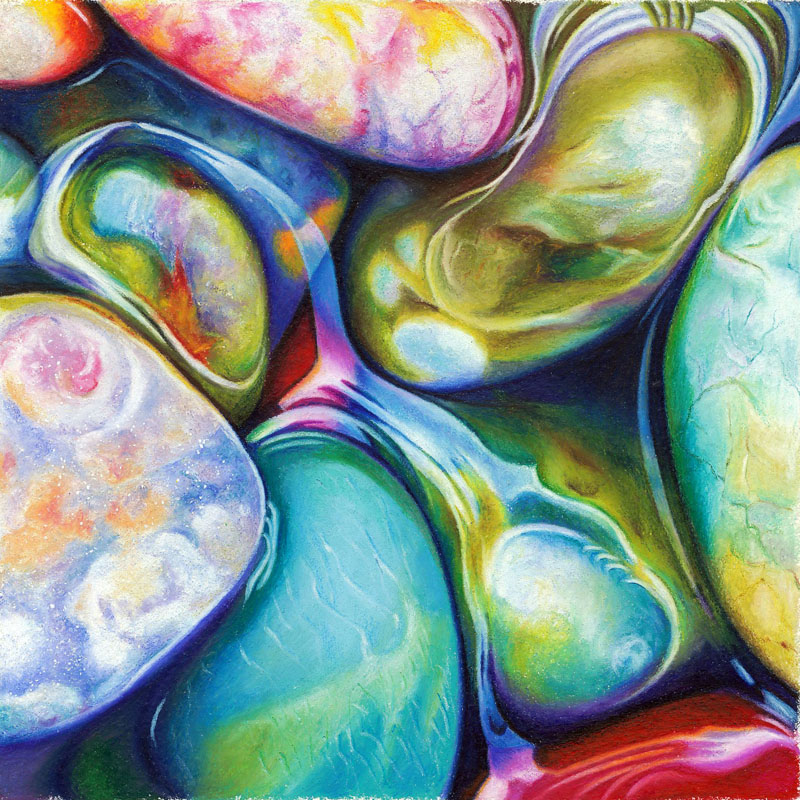
In the final step I reemphasize the highlights with a white colored pencil on the cool zone.
I will be posting a slide show of this project on my Icarus Art YouTube Channel sometime next week. Please subscribe if you haven't done so already.
If you have any questions about my project, feel free to ask them on this blog or make a comment. I'm always glad to hear from you!
6 comments
Jill
January 09, 2012
Wow this process is awesome! I feel like I can just pluck those pebbles out of the water. :)
Ester Roi
January 09, 2012
Thank you, Jill! It’s a really fun process. :)
Teresa Mallen
January 10, 2012
Congratulations on this ‘small art series’! As usual your rock art simply rocks!!!! :-)
Ester Roi
January 11, 2012
Thank you, Teresa! I’m really enjoying working small. :)
Cindy Cradler
January 11, 2012
Amazing step by step process. Motivating me to get to the “drawing board” and keep experimenting with the heat!
Ester Roi
January 11, 2012
Thank you, Cindy! I appreciate your feedback and I’m glad my step-by-step is helping you to keep experimenting!