Holiday 2021 Promo15% off all artwork, limited time offer!

Newsletter Subscription

Subscribe to my newsletter to receive 4 to 5 emails per year where I highlight important news, available originals, and seasonal specials.

Blog Category: Media

Report on my San Diego Demonstration

I love those San Diegan CPSA chapter members! They always make me feel welcomed and appreciated.

Everyone was very interested in learning how I work with canvas on the Icarus board. When I rolled out my 24" x 48" canvas in progress I could definitely see their curiosity peaking.

Here are the points I discussed during my presentation:

  • why canvas
  • what type of canvas
  • how to prime it
  • how to mount it and varnish it

Afterwards I demonstrated the three main techniques I use when working with canvas on the Icarus board :

  • mapping the main colors with wax pastels (low temperature)
  • melting and thinning wax pastels (high temperature)
  • developing colors, values and details with colored pencils (medium temperature)

I set up three stations, each with a board at a different temperature, so that a line of attendees could swiftly move through the steps and try the different applications. Unfortunately, after I answered all their questions, there wasn't enough time for everybody to try to replicate the techniques. However, I think they all walked away with a sense of new possibilities.


Inching Toward the Finish Line

I'm inching toward the finish line and soon I will be done with my largest piece ever. Below is a picture of what I've accomplished so far.

I'm not surprised to have discovered that I enjoy working big. When I used to paint in oil (back in the nineties) my smallest canvas was 30" x 30". It never occurred to me to paint any smaller. That feeling stayed with me even after I transitioned to colored pencil.

The Icarus technique has allowed me to tackle larger work, especially by combining colored pencils with wax crayons (artist crayons) and oil pastels. I'm also realizing that time is not necessarily proportionate to size. 

On my final post I will tell you how I'm able to speed up the process, how I feel about working on canvas, and I will show you some close-ups of the progress. Stay tuned!


“Ephemeral Journey”


Title: "Ephemeral Journey"

Size: 13.5" x 14"
Medium: Caran d'Ache Neocolors I and II, Caran d'Ache Luminance Colored Pencils, Prismacolor Colored Pencils 
Tools: Tortillions, Paper Stumps and Colour Shapers 
Surface: Extra Fine Texture Canvas primed with several coats of clear Art Spectrum Colourfix Supertooth Primer
Technique: Icarus Drawing Board
Presentation: Mounted on a 3/4" Ampersand Claybord, varnished and framed

To see how I mount and varnish my artwork please refer to my post on Glassless Framing.


Pushing the Limits

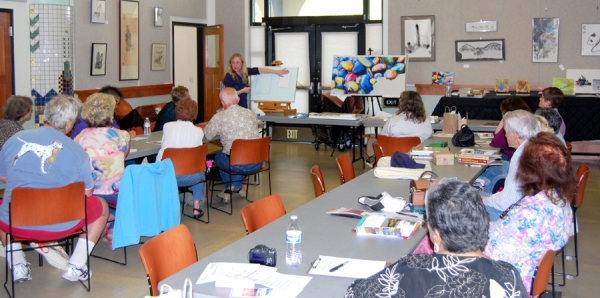
Last summer at the Laguna Beach Festival of Arts I had the opportunity to talk to hundreds of visitors and many of them inquired if I had large-scale work available. This rekindled my longstanding desire to create bigger art.

After much experimenting I realized that the best way to accomplish this goal was to find a flexible surface that I could place on top of my Icarus board without damaging it (the surface). I knew that paper was not my best choice because large sheets tend to crease or bend when used on a desk.

I tested various substrates and found that canvas had the flexibility needed for my purpose. I purchased a roll of Caravaggio Extra Fine Double-Primed Cotton Canvas, the finest texture canvas available. Artists who would like to experiment with canvas and the Icarus board for the first time are advised to purchase a portrait-grade stretched canvas, unstaple it from the bars, and then, after the painting is finished, re-stretch it on the same bars.

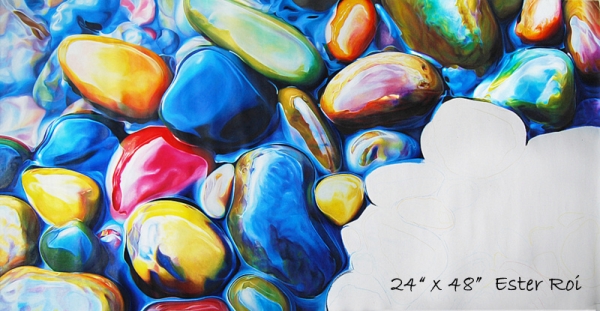
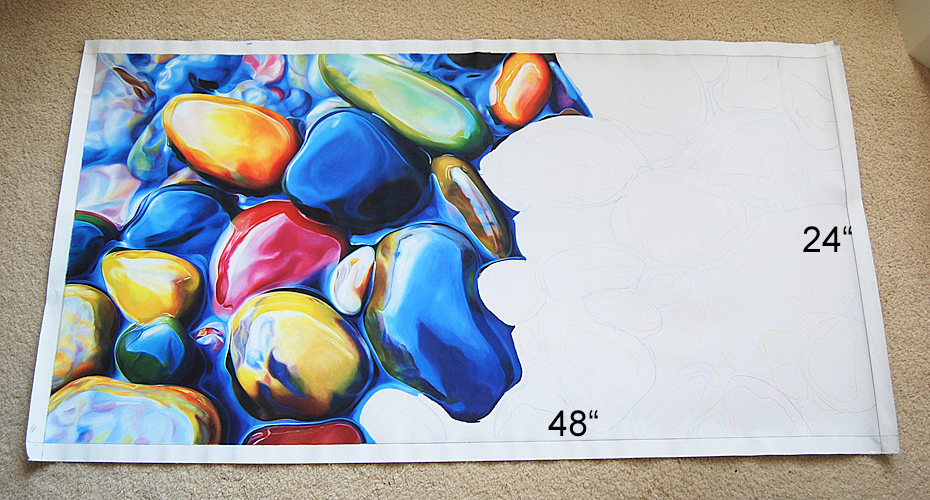
My first attempt to work large was a 28" x 48" piece, temporarily named The Quarry. I primed the canvas with three coats of Art Spectrum Colourfix Supertooth Primer, clear. This primer helps colored pencil and wax & oil pastel adhere well to the canvas. When I prefer a smoother texture I use the regular Art Spectrum Colourfix Primer, clear instead.

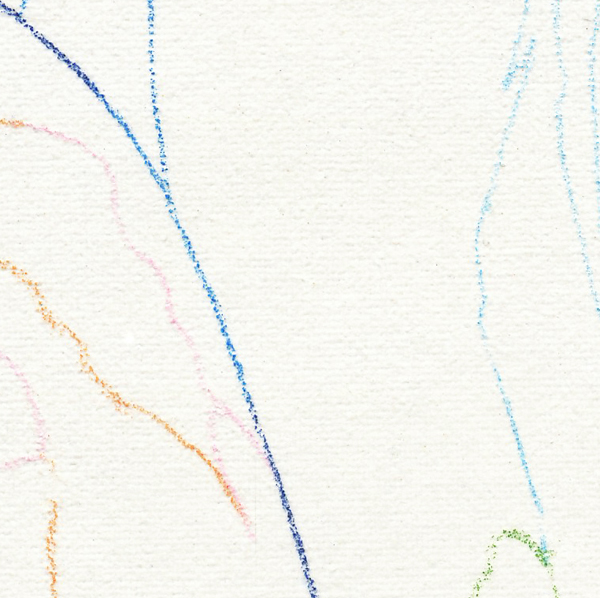
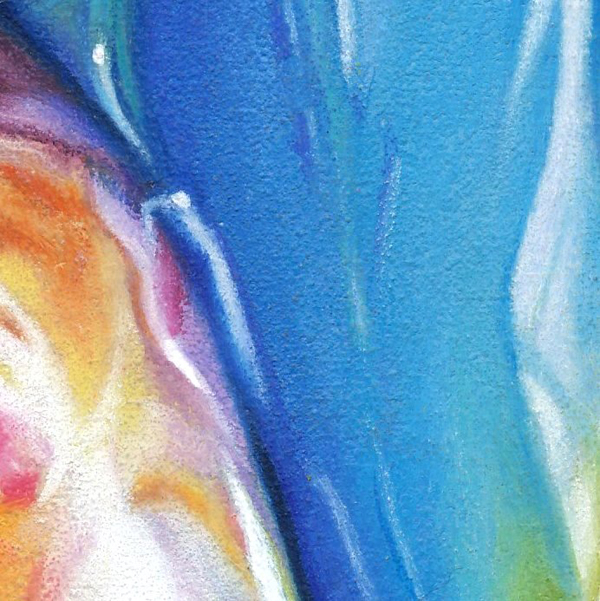
Below you can see the first two passages I accomplished:

First passage: blocking-in

Second passage: melting

Blocking-in detail

Melting detail

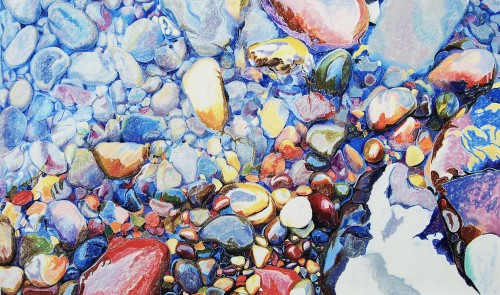
As I was getting ready to tackle the third and final passage to develop color, values, and details, I changed my mind about finishing The Quarry and put it temporarily aside.

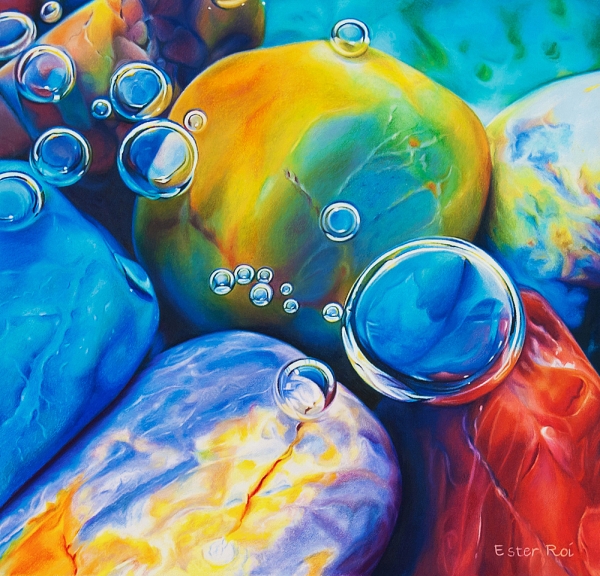
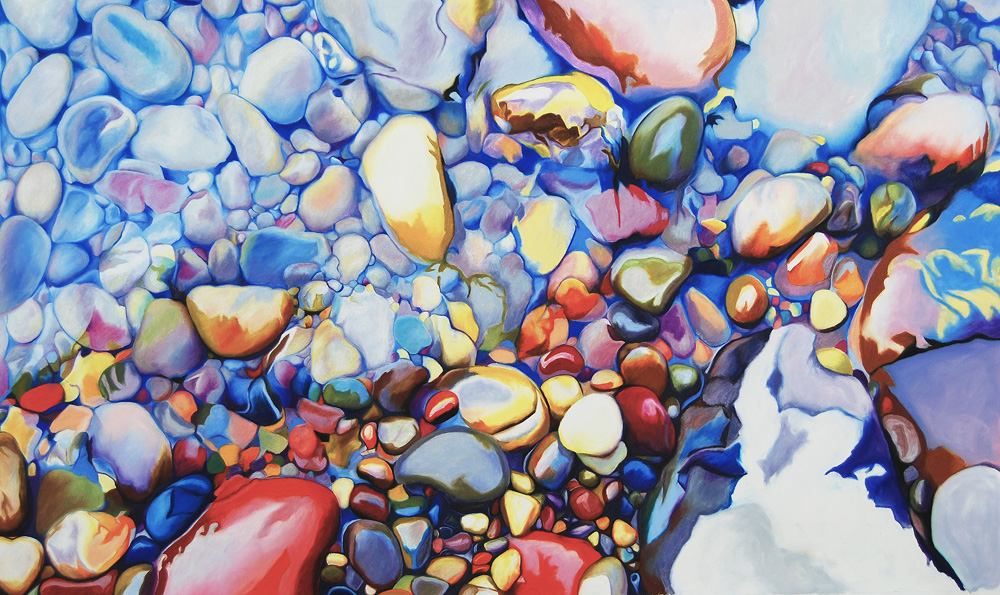
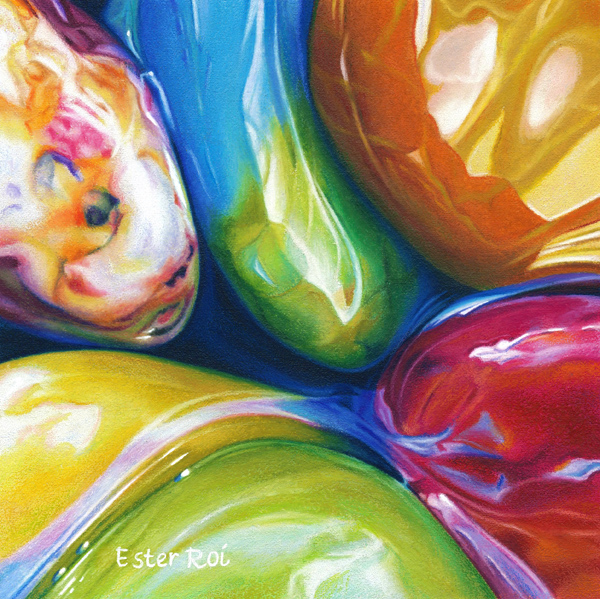
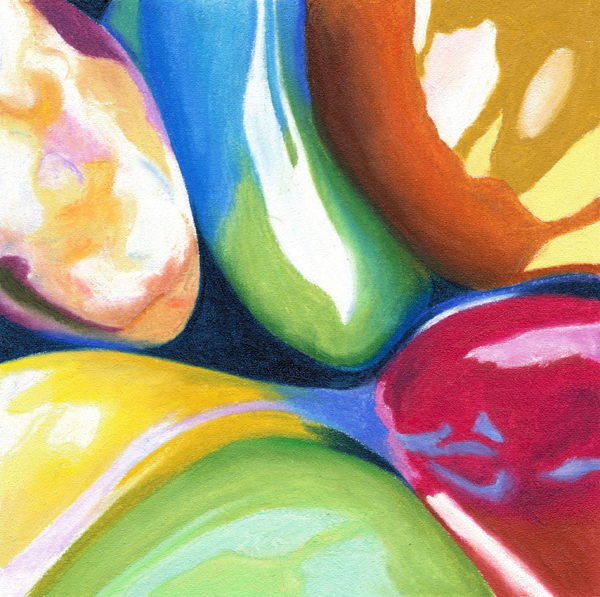
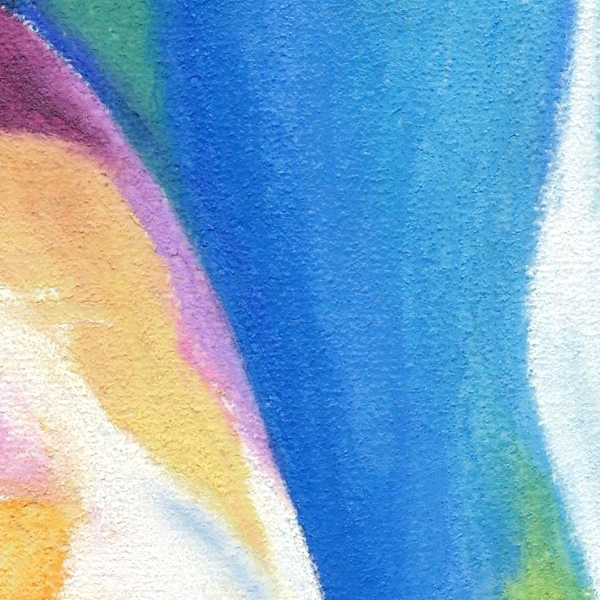
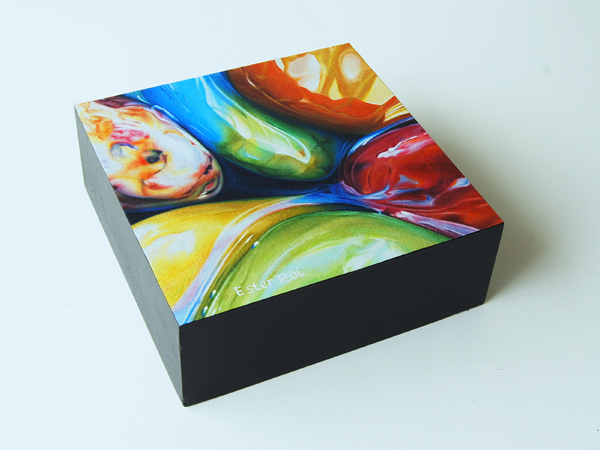
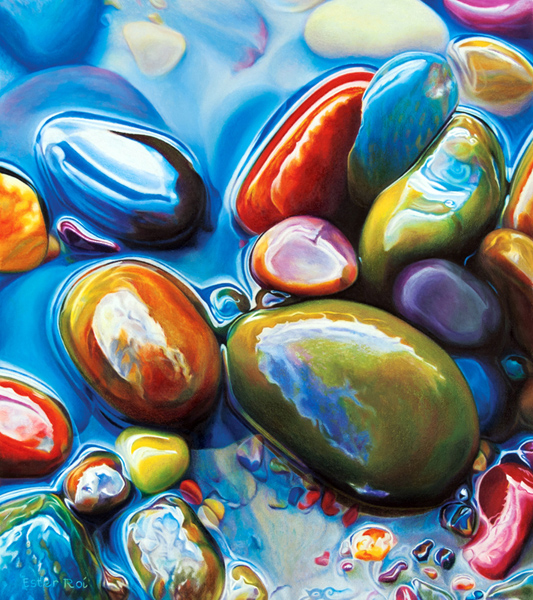
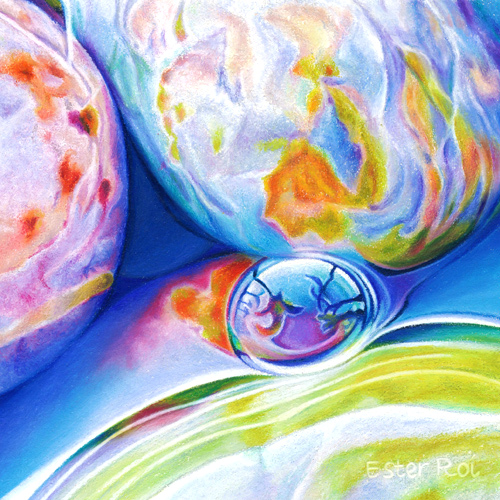
One of my favorite artwork, In Between (see image below), sold as soon as I posted it on my blog. I had something special planned for that piece!

In Between

For that reason, after asking permission to my collector and changing its size, I decided to re-do it four times as big as the original. If you're interested in this topic of making repeats, I suggest you read Robert Genn's newsletter Identical Twins.

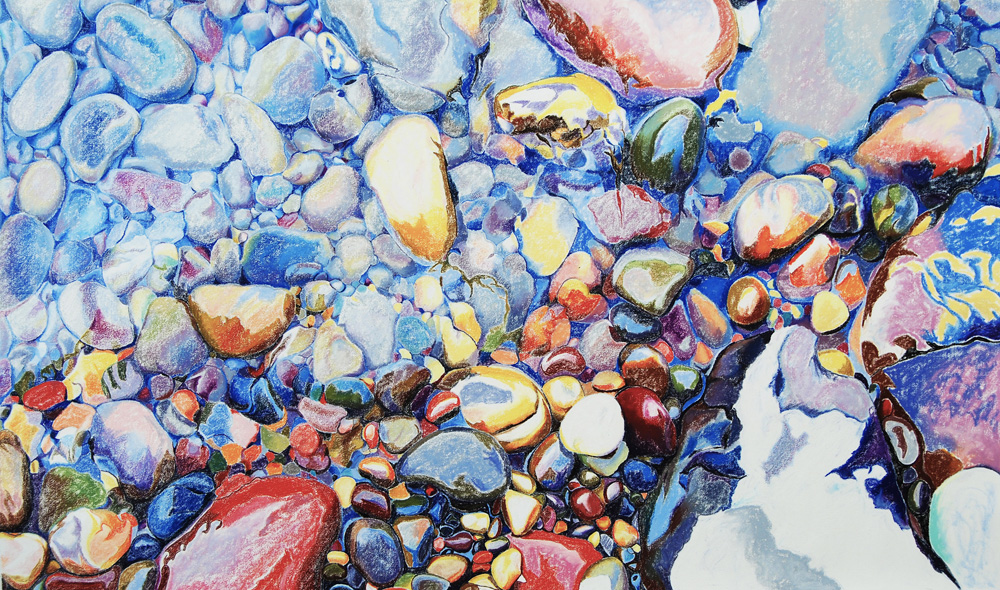
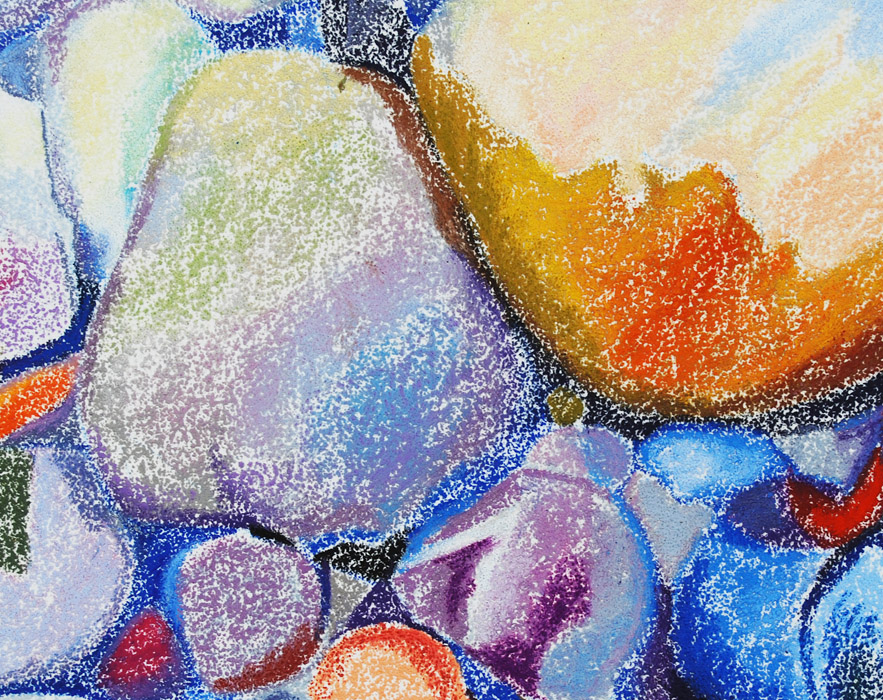
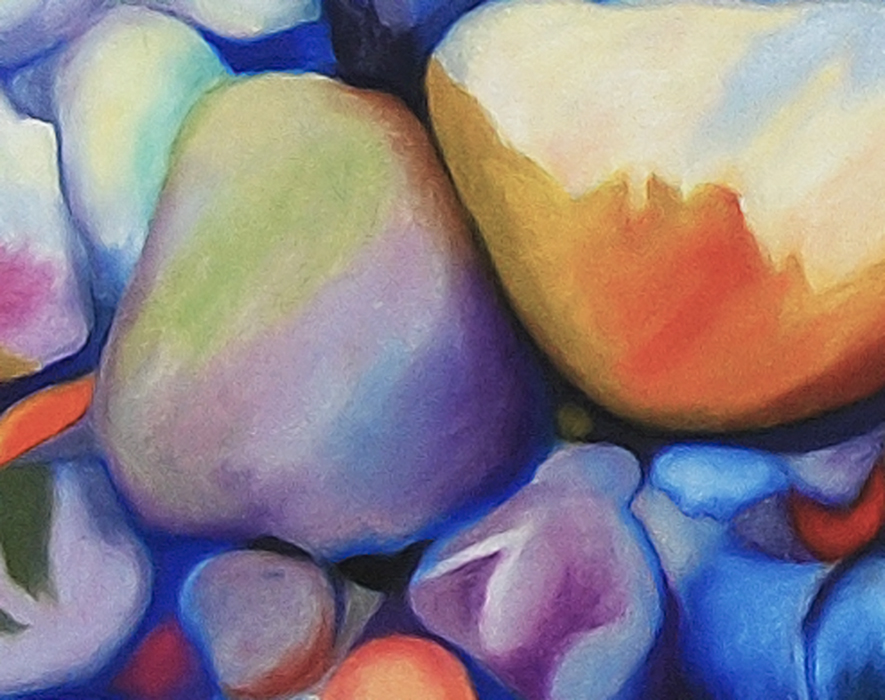
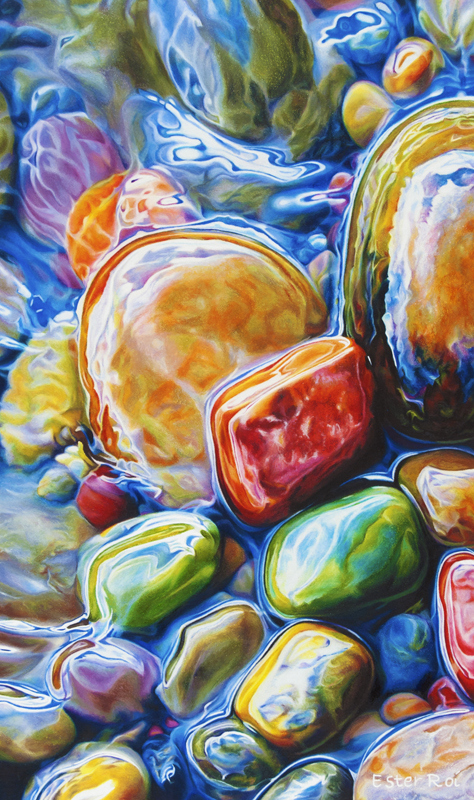
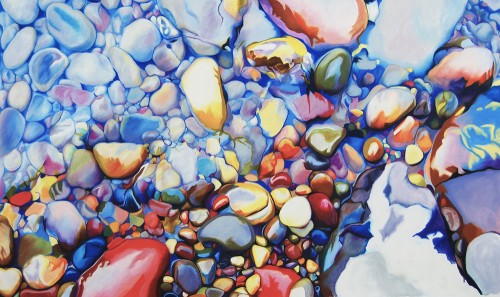
Soon I began working on the 24" x 48" twin of In Between. I'm only about half-way done because other more urgent, smaller pieces are taking precedence.

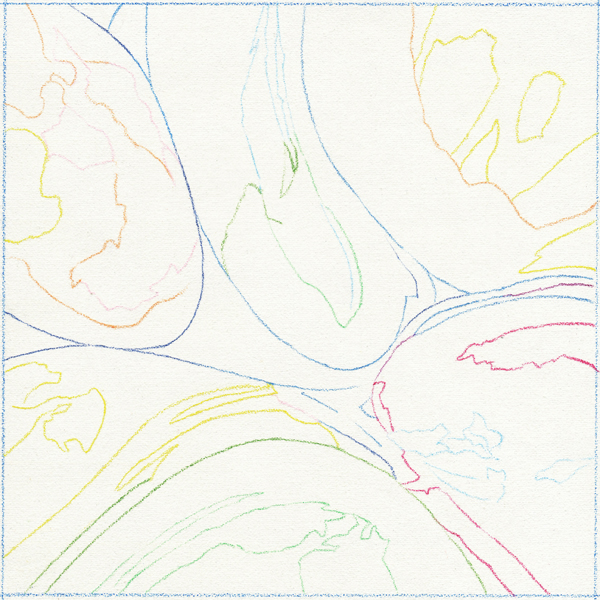
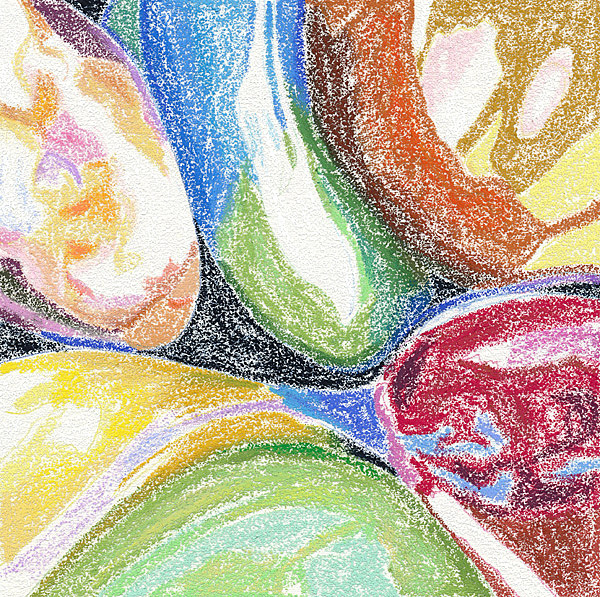
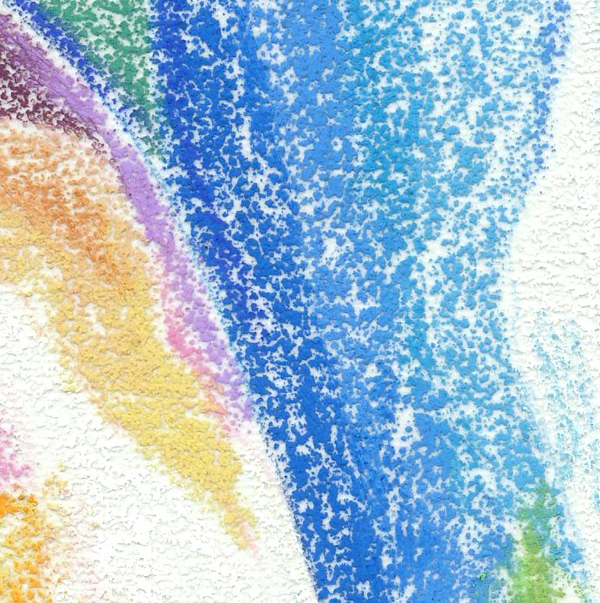
The strategy I'm following with the 'twin' is different than that of The Quarry. Since it's a re-do, I don't feel the need to block-in the whole composition and colors. As you can see from the image below, I'm completing one stone at a time.

Eventually, as I garner more experience with large sized artwork using the Icarus board, I will share with you all the tips and tricks learned along the way.

The 'twin' halfway done

When I was a little girl my father used to ask me: "Ester, why do you always push the limits?". He was naturally worried! I understand now, because I have a son who's exactly like me.


“River Pebbles, No. 11”

River Pebbles, No 11

Title: River Pebbles, No. 11

Outline - Cool Zone

The outline was accomplished with Prismacolor Verithin on the cool zone of the Icarus board.

Color Mapping - Warm Zone - Low Temperature

After drawing the outline I proceeded to map the main colors with Neocolor artist crayons on the warm zone of the Icarus board using a low temperature.

For more on color mapping with artist crayons you can view the following videos:

Melting - Warm Zone - High Temperature

With temperature setting at maximum, I melted the artist crayons using clay shapers (also known as color shapers).

For more on melting artist crayons you can view the following videos:

Tools for Melting Artist Crayons

In the picture above you can see the two color shapers I used for melting and the wet sponge for cleaning. For easier cleaning I spray the surface of the wet sponge with a little Simple Green.

Outline - Detail

Color Mapping - Detail

Melting - Detail

Refining - Detail

Refining with Colored Pencil - Medium Temperature

With the temperature set at medium I developed the colors, values and details of the pebbles by layering and blending colored pencils with a variety of tools like tortillions, paper stumps and a Caran d'Ache blender.

Mounted on 2" Thick Clayboard

I finally mounted the canvas on a 2" thick Claybord and painted the sides with acrylic. The artwork is now ready for varnishing.


“River Pebbles, No. 10”

River Pebbles, No. 10


Title: River Pebbles, No. 10

For techniques used in this artwork, please see blog post River Pebbles, No.3 - Melting Artist Crayons