Holiday 2021 Promo15% off all artwork, limited time offer!

Newsletter Subscription

Subscribe to my newsletter to receive 4 to 5 emails per year where I highlight important news, available originals, and seasonal specials.

Blog

“River Pebbles, No. 13”

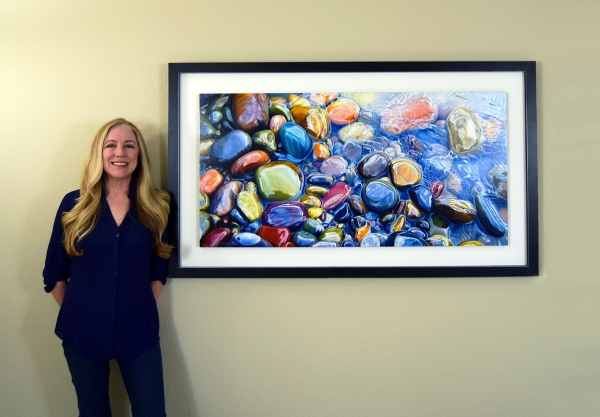
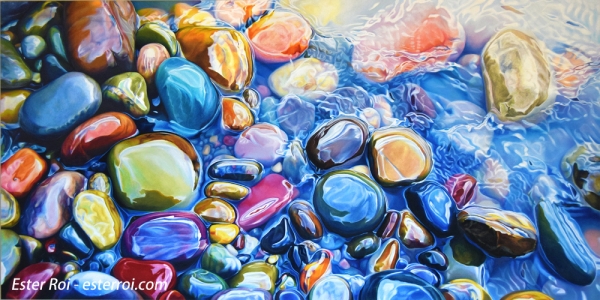
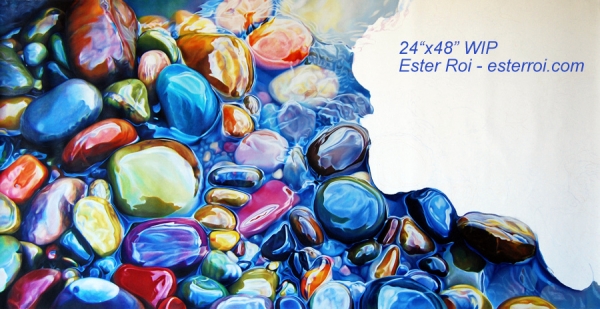
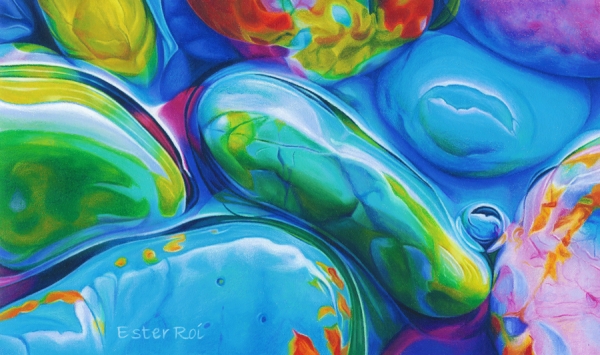
Title: "River Pebbles, No. 13"
Size: 8" x 8"
Medium: Prismacolor colored pencils, Luminance colored pencils, Neocolors artist crayons
Tools: tortillions, paper stumps, and color shapers
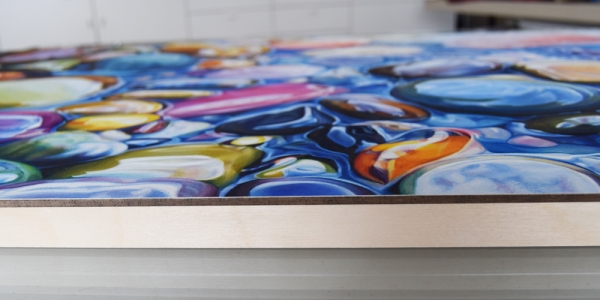
Surface: Art Spectrum Colourfix Supertooth board
Icarus Technique

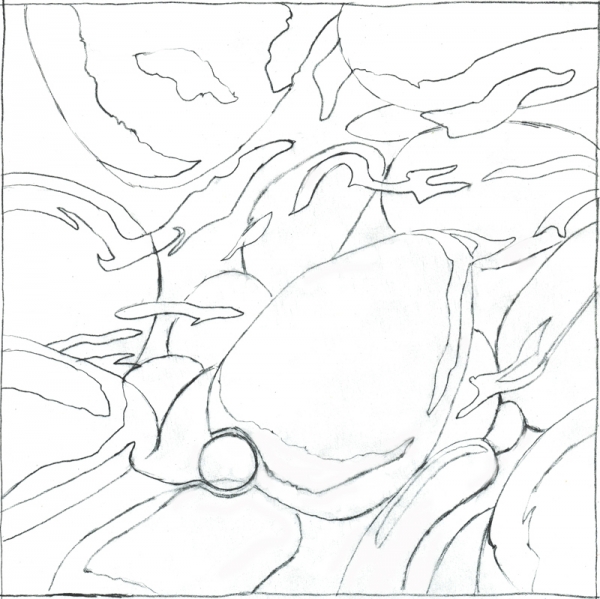
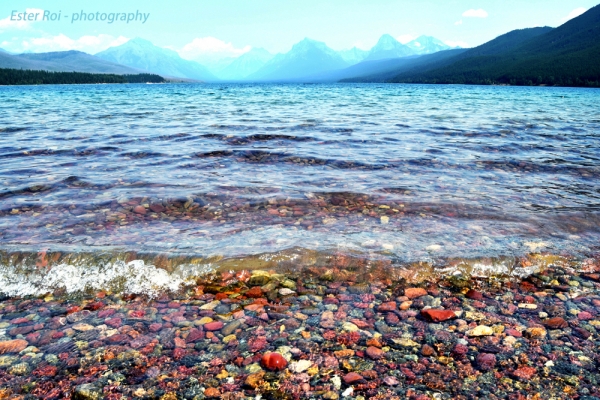
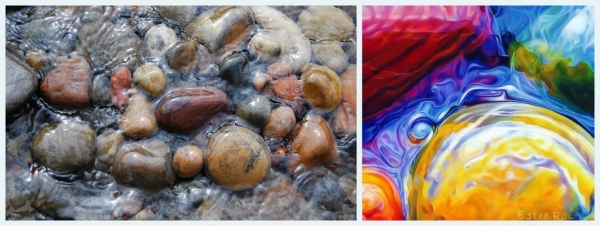
I created a graphite sketch from five different photo references I took during my trip to Montana. I always make sure to have many photos of the same subject, especially when dealing with moving water, so that I can combine the best parts into a drawing.

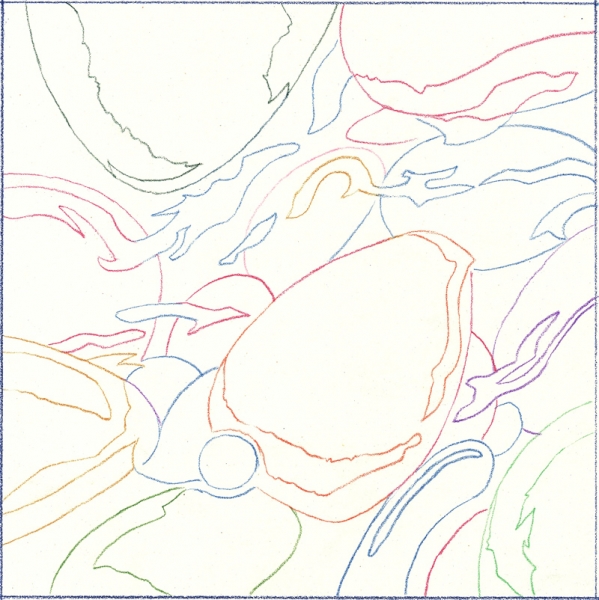
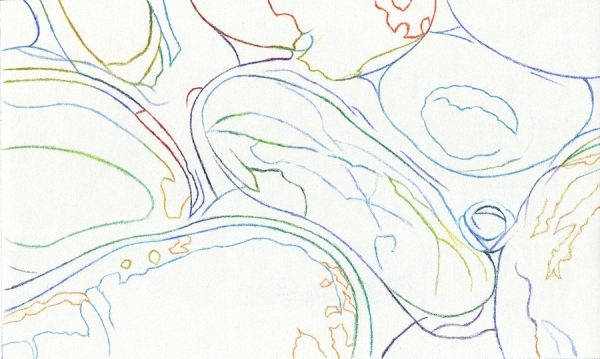
I then transferred the original sketch using Verithin colored pencils to avoid having to erase the graphite pencil.

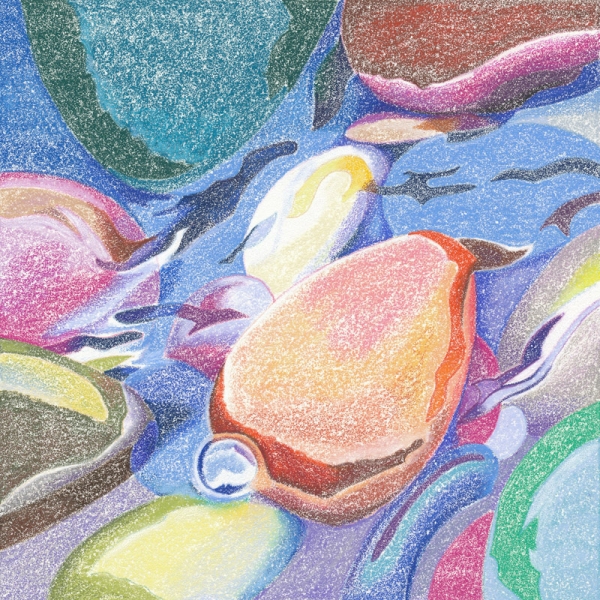
After drawing the outline, I proceeded to map the main colors with Neocolor artist crayons on the warm zone of the Icarus board at low temperature. During this step it's not important to include all nuances and details as these can be developed later with colored pencils.

For more on color mapping with artist crayons you can view the following video: Mussel Shell - Blocking in Colors with Artist Crayons

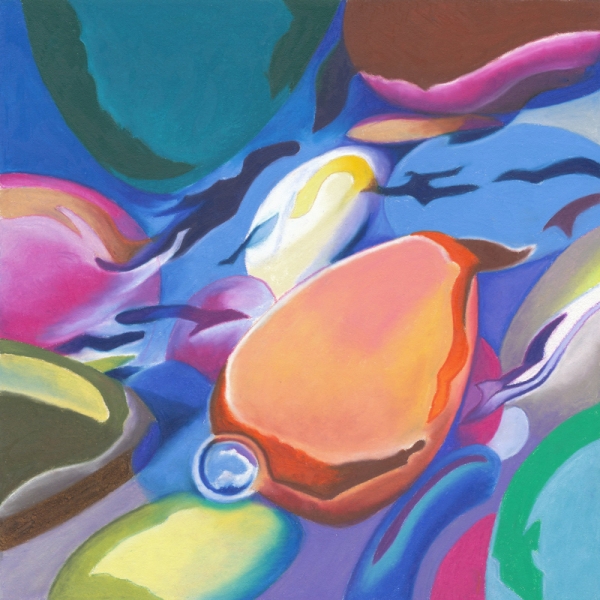
With temperature set at maximum, I melted and blended the artist crayons with a clay shaper (also known as color shaper). 

For more on melting artist crayons you can view the following video: Mussel Shell - Melting Artist Crayons

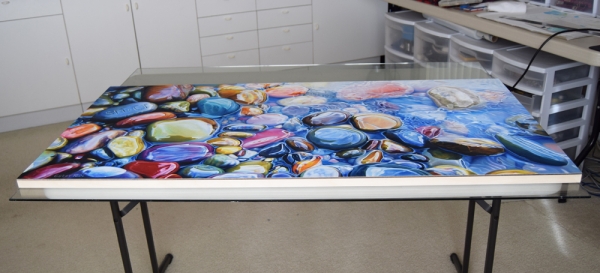
With the Icarus board set at medium temperature I developed the colors, values and details by layering and blending colored pencils with a variety of tools (tortillions, paper stumps, Caran d'Ache blender). During this step I made quite a few changes from the original outline; I removed a bubble and several small pebbles, aiming to simplify an already complex drawing.

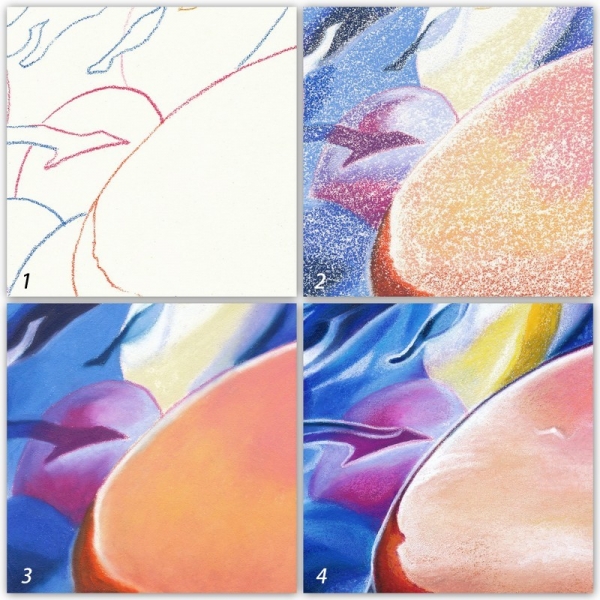
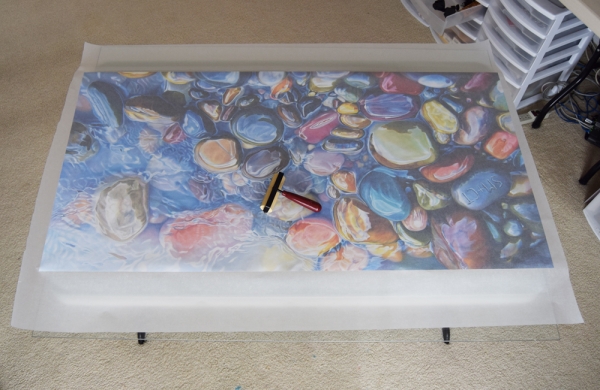
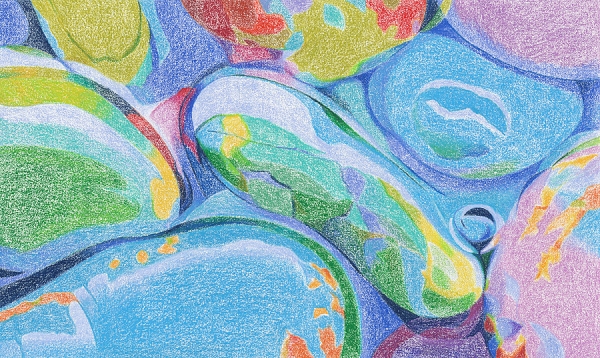
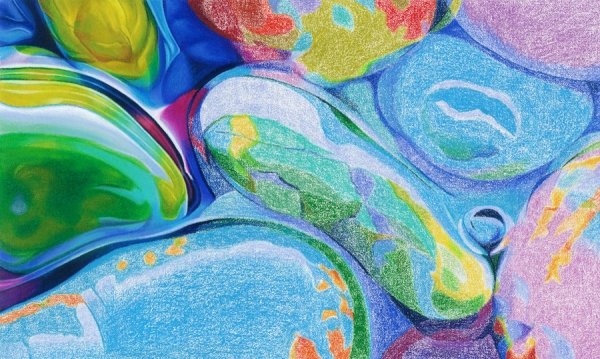
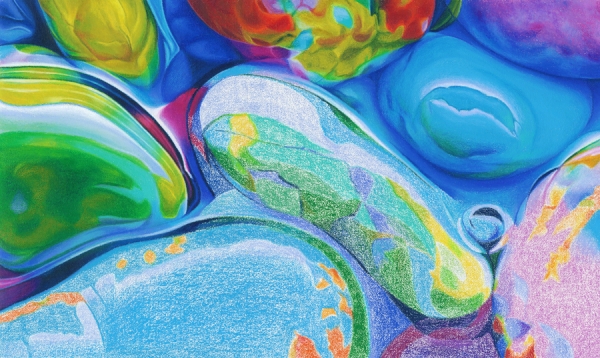
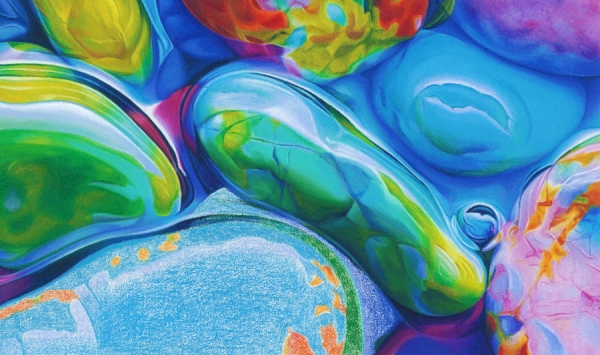
Here are close-ups of the main steps: outline, mapping, melting, and developing.

I hope you enjoyed this step-by-step.


Commission Ready to Ship

"Everlasting", my 24" x 48" commission, is now framed and ready to ship. In the photo below, with myself by the artwork, you can better appreciate its size.  


How to Mount Canvas on Board

I used to mount canvas on board with Frank's PH Fabric Adhesive. I demonstrated how to do it on a previous blog post: Canvas and the Icarus Board: Final PostAlthough this method worked pretty well, the glue would always moisten the canvas which would take a long time to dry before I could varnish it. I finally found a double-stick adhesive that is suitable for rough surfaces like canvas.


Above are my finished canvas and a roll of adhesive on top of a 24" x 48" Claybord.


Gudy 831 is a very aggressive double-stick adhesive especially suitable for application on rough or textured surfaces. It's acid free (pH 7), passed the photo activity test (PAT), and will not dry out or discolor with age. It's available on rolls with a single release liner. Easily applied by hand, it will never dry out or discolor with age. Gudy 831 can be purchased online from Talas in different size rolls.


After carefully unrolling the adhesive onto the surface of the Claybord (sticky side toward the board), I burnished it with a brayer and trimmed the excess around the edges. I punctured the air bubbles with an X-Acto knife and burnished until the air was all gone. 


Here's a close-up of a seam where I had to join two separate sheets of adhesive because the roll wasn't wide enough. Again, I pressed the seam with a burnisher.


This is the canvas ready to be mounted, after I trimmed the white edges. At this point my piece measures 24.5" x 48.5", half an inch larger than the board, to account for possible misalignment during mounting. 


I created a fold on the release liner to expose a 1" wide section of the tacky area.


I positioned the canvas over the board and, when perfectly centered, I pressed down on the canvas over the exposed 1" section of adhesive.


Then I slowly pulled away the release paper while unrolling the canvas over the adhesive. With a sheet of tracing paper covering the canvas, I gently rubbed the surface with a rag until all the release paper was pulled out.


I rolled a rubber brayer all over the surface protected by tracing paper.


I turned the board upside down and trimmed the extra canvas with an X-Acto knife.


To achieve perfect cuts I used a fresh blade for each side of the artwork.


Finally I placed the board under heavy books overnight. Using Gudy 831 allowed me to begin varnishing the day after mounting the canvas.


Title: "Everlasting"
Size: 24" x 48"
Medium: Prismacolor and Caran d'Ache Luminance Colored Pencils, Neocolor Wax Pastels, Holbein Oil Pastels
Surface: Extra Fine Texture Canvas primed with two coats of clear Art Spectrum Colourfix Primer
Icarus Technique


Back from Vacation

I just returned from a fabulous vacation in Montana’s Glacier National Park. I usually schedule my vacation trips around areas where I can find inspiration for my art. This trip was no exception as you can see in the pictures below.

Lake McDonald was definitely worth the 4 day round trip drive. However, the best pebbles and glacial crystal clear water I found in the river feeding the lake, the McDonald Creek.

The natural beauty of Montana really filled my soul with awe and inspiration. I’m very eager to further develop my passion for rocks and water through a new series and perhaps even a different medium as well. However, I first need to finish my current commission. Below is a progress image of the 24" x 48" canvas that I hope to complete by the end of the month.


“Cambria”

Title: "Cambria"
Size: 6.5" x 11.5"
Medium: Caran d'Ache Luminance Colored Pencils
Tools: Tortillions, Paper Stumps, Full Blender Bright
Surface: Extra Fine Texture Canvas primed with two coats of clear Art Spectrum Colourfix Primer
Technique: Icarus Drawing Board

Above is the outline of this project. It's a combo piece of two small artworks I did in the past. After I developed the drawing in graphite, I transferred it onto the canvas using local colors.

Here I've blocked-in the main colors using a low temperature setting, just enough heat to make the layering a little faster and more even. Now I have a clear map of the basic colors.

After turning up the temperature dial to a medium setting I began burnishing. This is the process of saturating the canvas with pigment. I'm developing the values while blending colors and adding details. The only tools I use, besides the Icarus board, are tortillions, paper stumps, and a colorless blender.

More burnishing and blending in progress.

More burnishing and blending in progress

And finally the finished artwork. The title is after the location on the California Central Coast where I collected these pebbles.   


My Creative Process

The most important step in developing a small group of pebbles is to find a good composition. Nature appears very random at first glance. To discover a 'jewel' I need to practice patience and perseverance. After finding a good composition, I then begin adjusting values and colors. Rendering the drawing is really the icing on the cake.

Click here for the step-by-step of this artwork: River Pebbles, No. 12


Inspiring Children

A group of children from an elementary school in the UK, who were learning about rivers, decided to do a project inspired by my artwork. I'm so thrilled that my art connects with people of all ages, especially children!