Holiday 2021 Promo15% off all artwork, limited time offer!

Newsletter Subscription

Subscribe to my newsletter to receive 4 to 5 emails per year where I highlight important news, available originals, and seasonal specials.

Blog archives: 2012

CPSA “Explore This! 8” Award

Explore This! 8

I'm thrilled to announce that my artwork River Odyssey received the The CPSA District Chapters Award for Outstanding Recognition in "Explore This! 8", the Colored Pencil Society of America's online exhibition. Please visit the exhibition to view all the outstanding art selected by juror Jane Allen Nodine to be on display for a full year on the CPSA website. Click here to see the award winners.

This is my third acceptance into a CPSA "Explore This!" exhibition which qualified me to receive my CPX Signature Membership. I'm very honored to have earned my second signature status from the Colored Pencil Society of America.

River Odyssey


“River Pebbles, No. 2” - A Closer Look

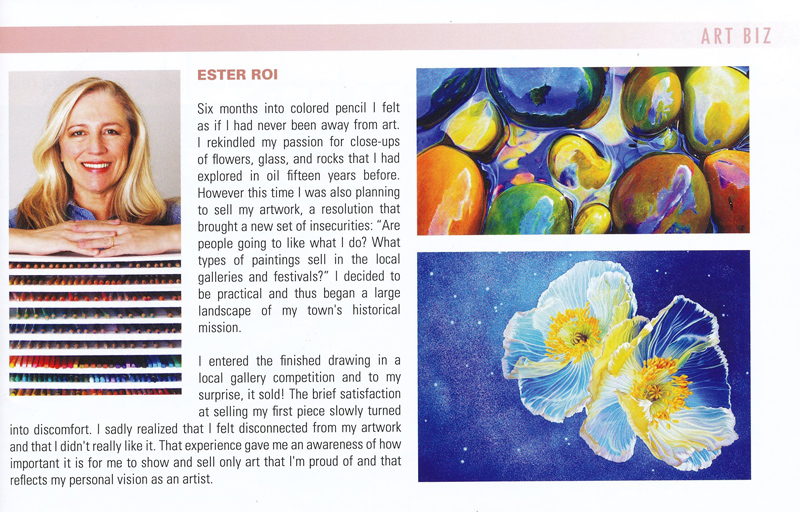
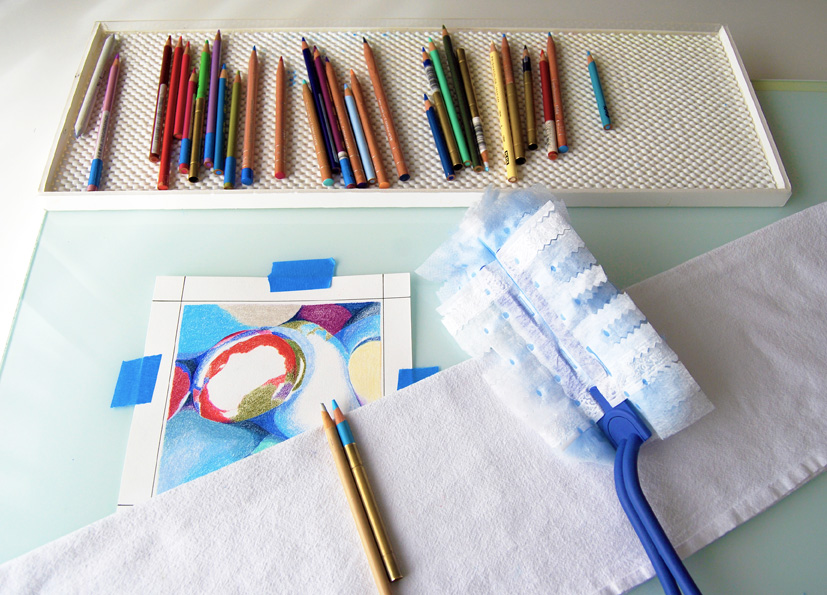
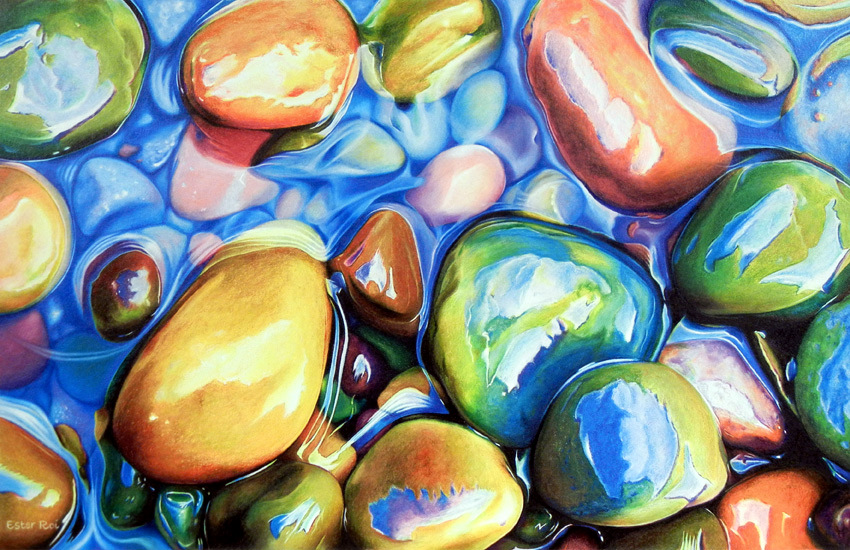
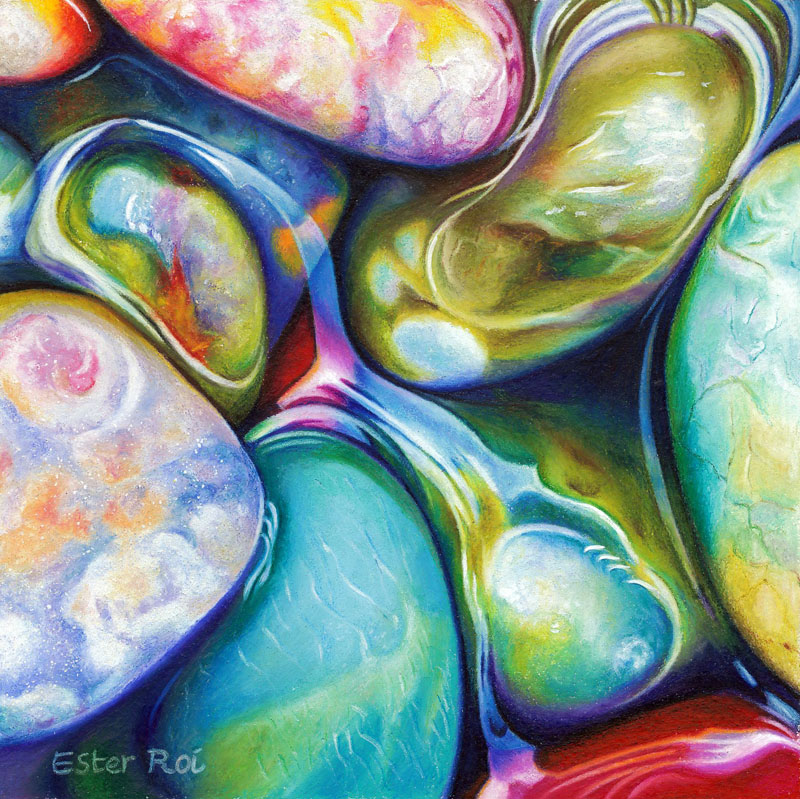
This is a closer look at my second work in a new series of small art depicting some of my favorite subjects.

Title: River Pebbles, No. 2
Size: 5" x 5"
Medium:  Prismacolor Premier Colored Pencil (Verithin and Softcore) and Caran d'Ache Luminance Colored Pencil
Miscellaneous: Lyra Splender Colorless Blender, Gray Paper Stumps
Surface: Stonehenge Paper
Technique: Icarus Drawing Board

River Pebbles, No. 2 is mounted on a 5" x 5" Ampersand Claybord with a 2" cradle. If you are interested in learning how I mount and varnish my artwork, you can read the following post: Glassless Framing.

Outline - Cool Zone

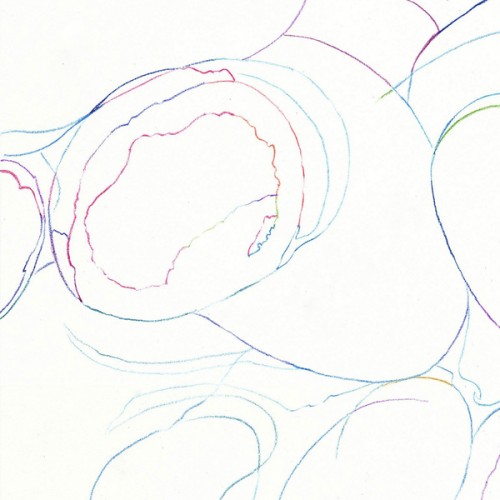
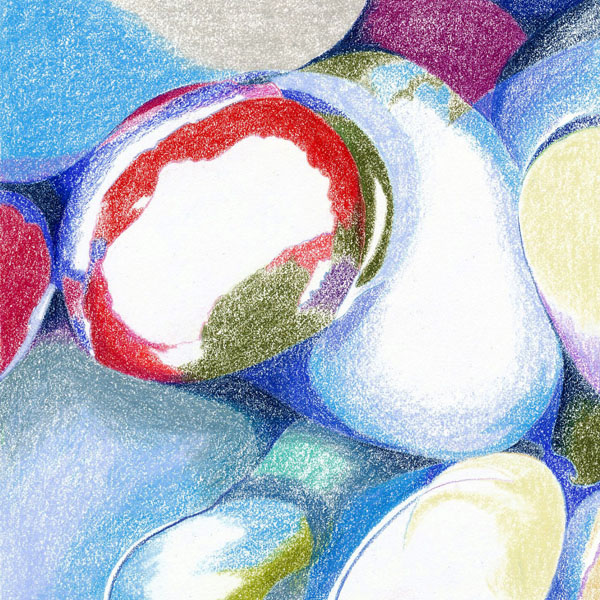
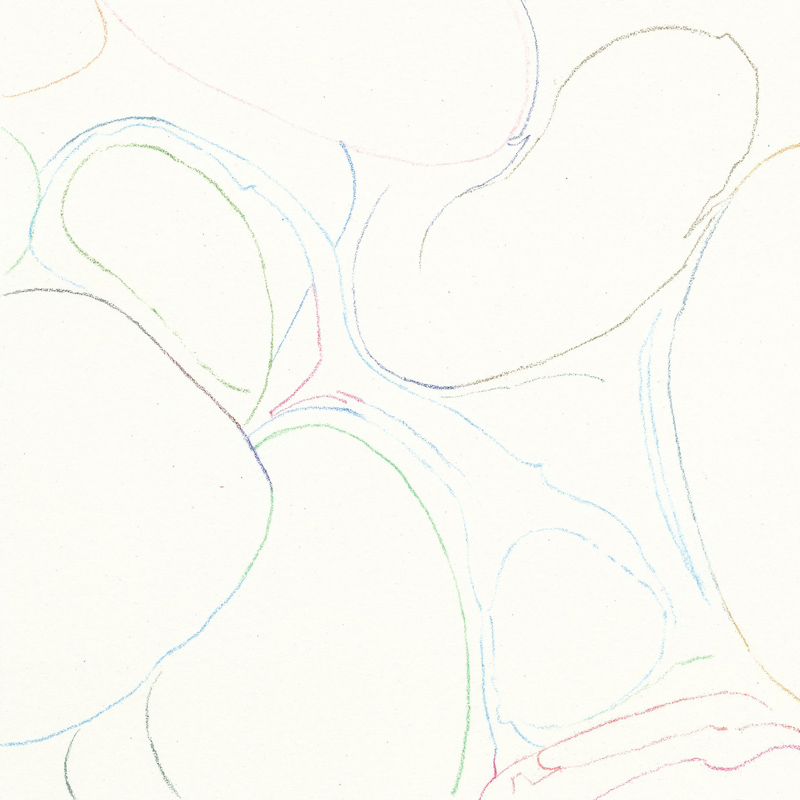
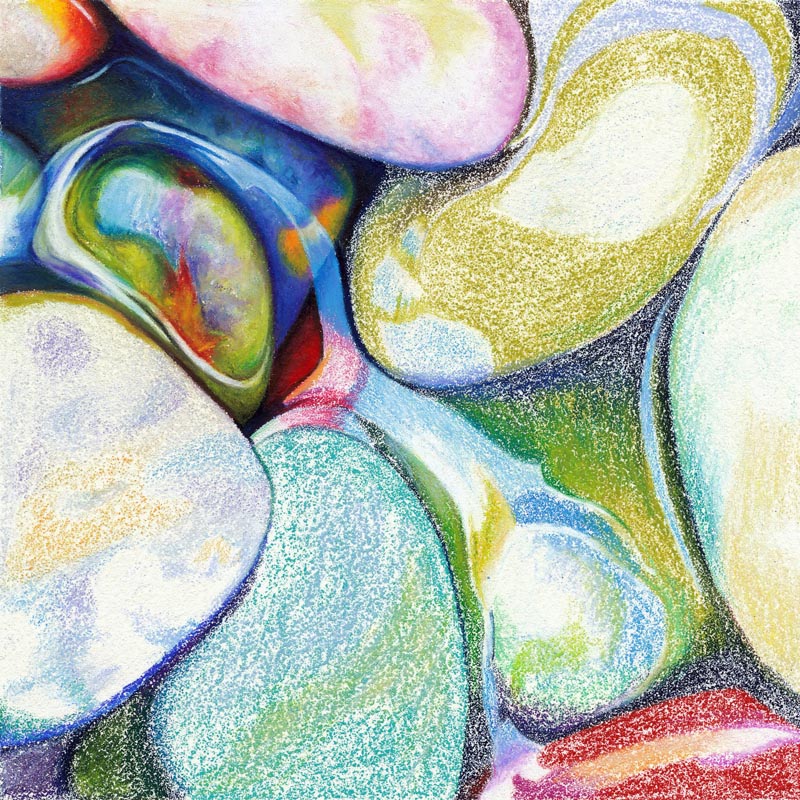
I always use Prismacolor Verithin to draw the outline of my subjects. It's important for me not to add too many details at this point, only the principal lines.

I prefer the back side of Stonehenge paper because it has a little more tooth than the front. That little tooth makes a big difference in how pigments layer, mix and blend, especially on the warm zone. A paper surface that doesn't have much texture is difficult to handle with heat.

Color Mapping - Cool Zone

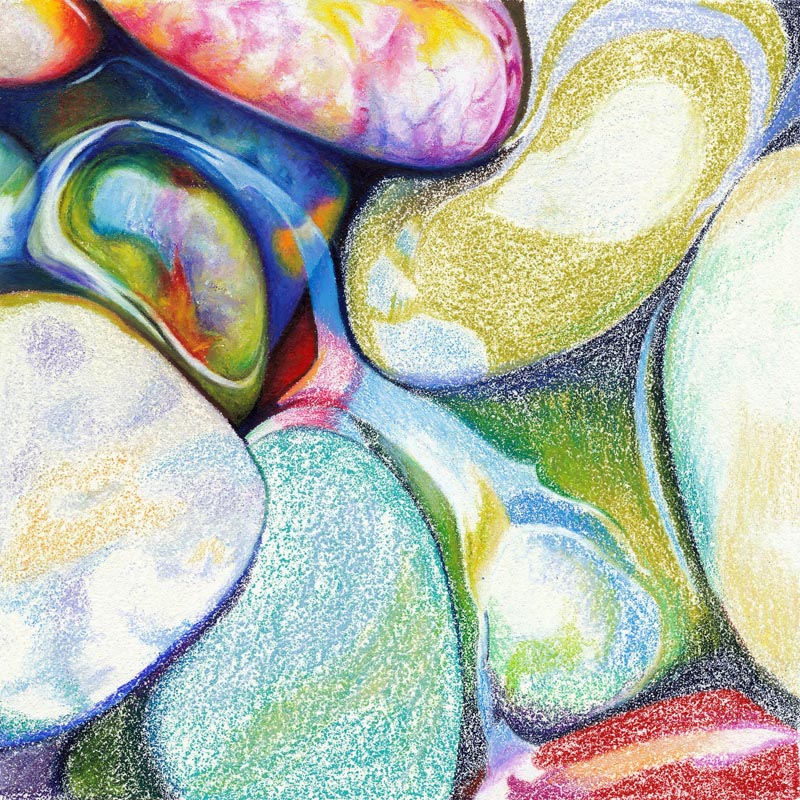
Color mapping on this paper is a little more time consuming than on a sanded pastel paper. I apply my Prismacolor Softcore and/or Caran d'Ache Luminance with medium pressure on the cool zone until 80-90% of the surface is covered with waxy pigment.

Burnishing and Blending - Warm Zone

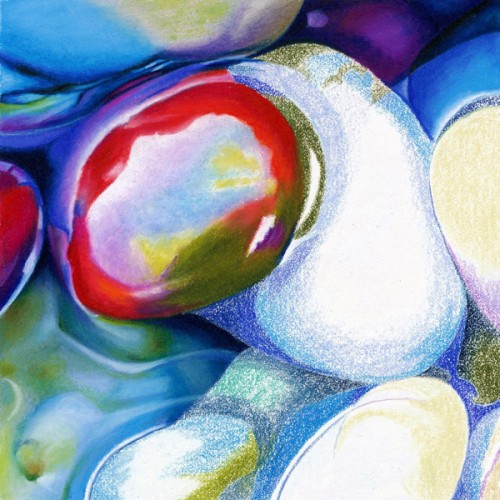
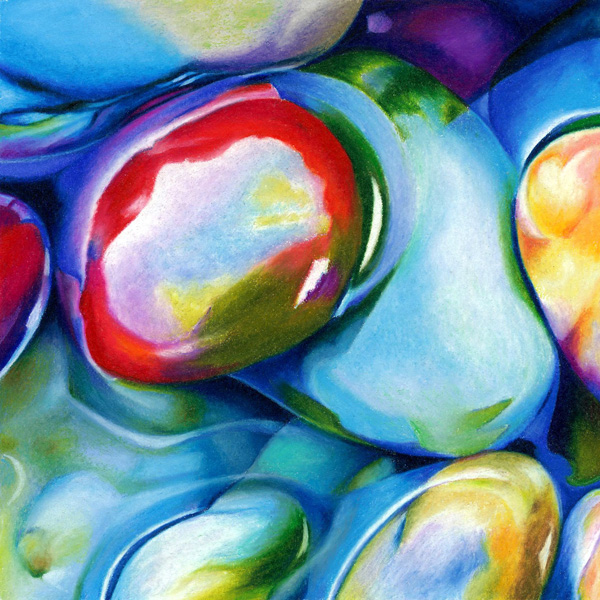
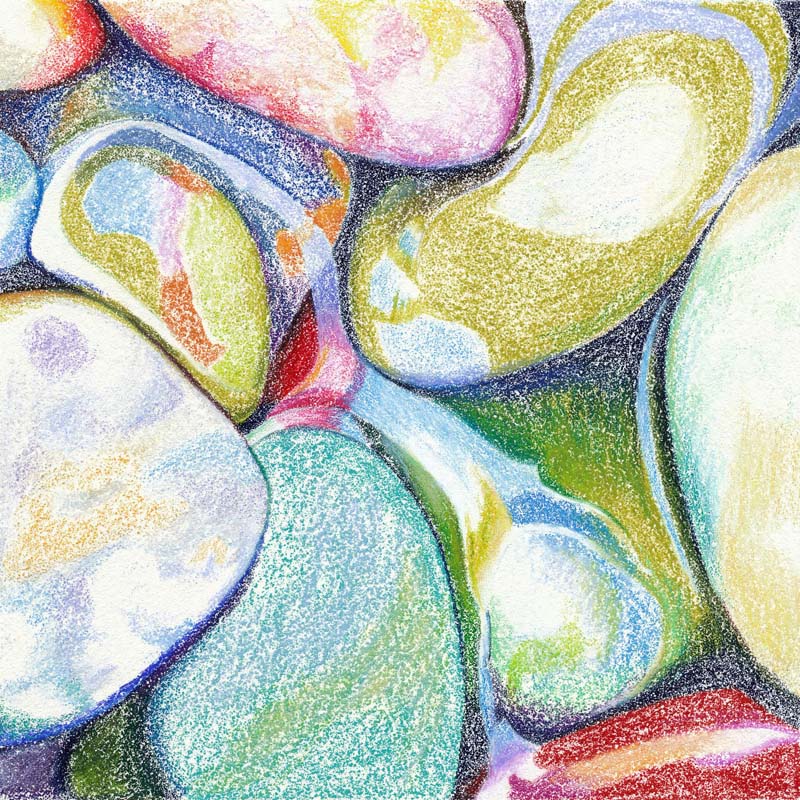
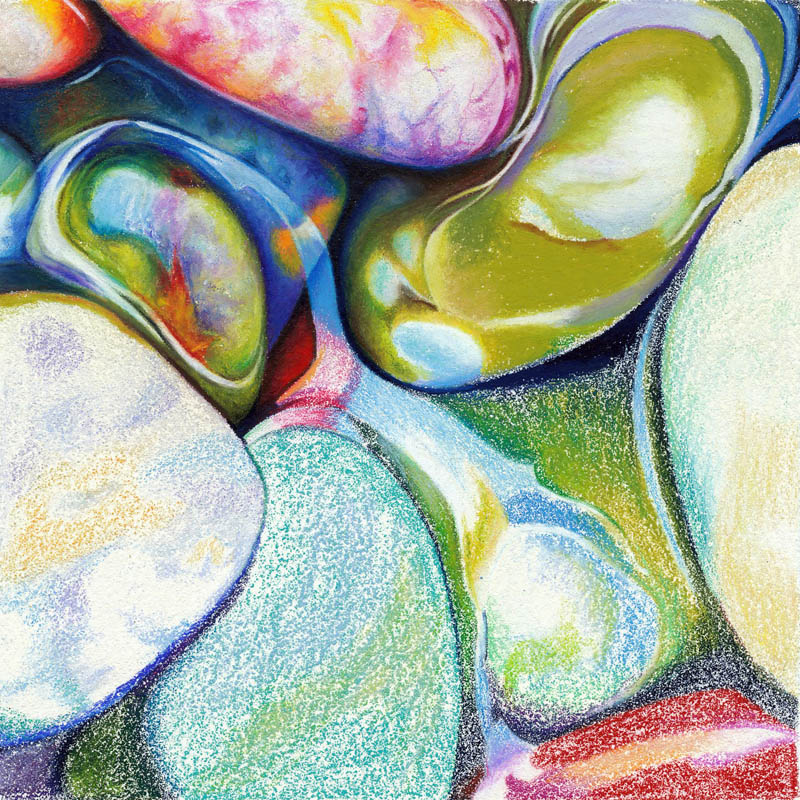
Listed below are the main steps I follow to develop the colors and values on the warm zone (high temperature):

  • Burnishing: I saturate the paper with pigment until the white of the paper is completely obliterated (I even burnish white colored pencil over the white areas).
  • Layering: I layer the colors by using the side of the pencil.
  • Blending: when called for, I blend the base and top color together with a paper stump.

Burnishing and Blending - Warm Zone

I continue in the same manner as in the previous step until the whole drawing is completely burnished.

Refining and Polishing - Warm and Cool Zones

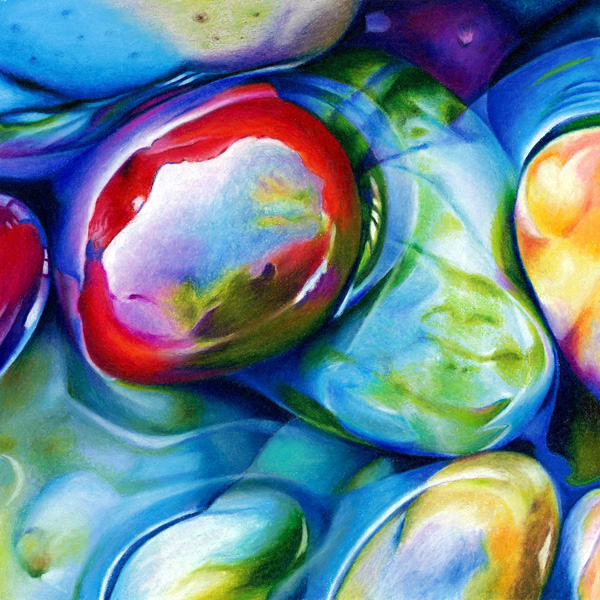
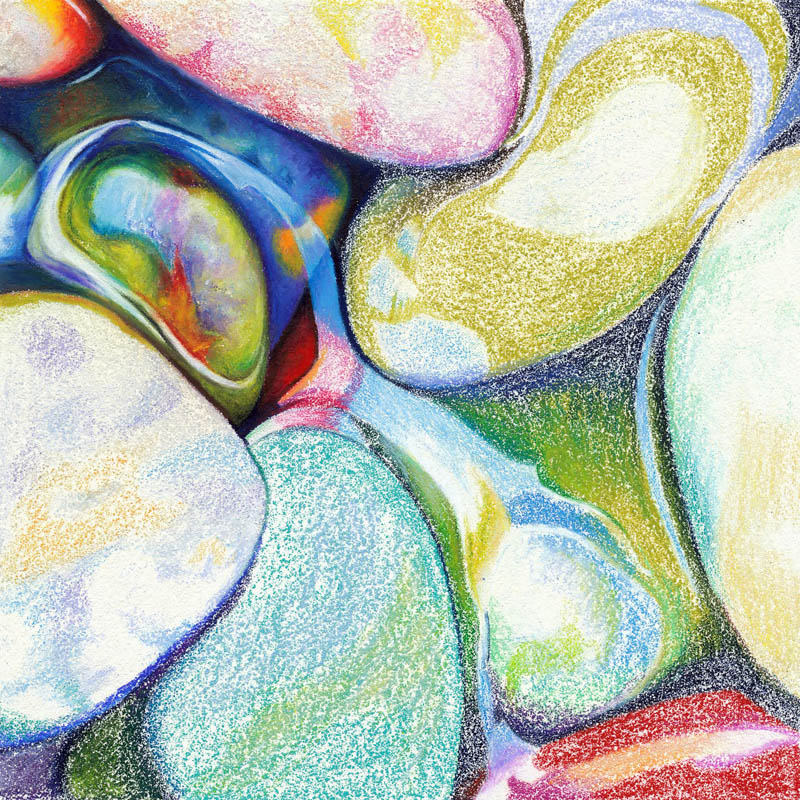
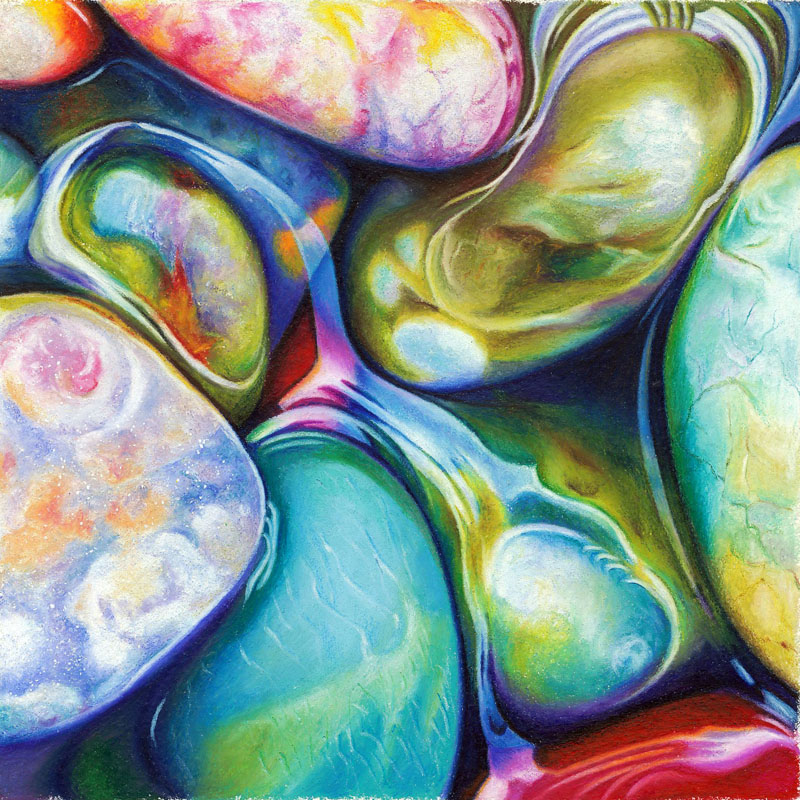
I'm adding more details to my drawing. I use the warm zone (medium to low temperature) to blend some of those details into the background, the cool zone to refine and polish with a colorless blender.

Refining and Polishing - Warm and Cool Zones

I continue in the same manner as in the previous step until the whole drawing is finished.

I need your feedback:

With my next small artwork I'm planning to start focusing on specific issues.

Do you have any suggestions? Are there any topics relating to my technique and my art that you would like me to address?

For example, Jill asked me to explain how I make my pebbles shine.

I'd love to get your input.


“River Pebbles, No. 2”

River Pebbles, No. 2

This is the second work in a new series of small art depicting some of my favorite subjects. The purpose of this series is to produce more regularly while also working on large pieces. Working small allows me to be more experimental with the Icarus Drawing Board. With each artwork I plan to share something interesting about how I made it.

Title: River Pebbles, No. 2
Size: 5" x 5"
Medium:  Prismacolor Premier Colored Pencil (Verithin and Softcore) and Caran d'Ache Luminance Colored Pencil
Miscellaneous: Lyra Splender Colorless Blender, Gray Paper Stumps
Surface: Stonehenge Paper
Technique: Icarus Drawing Board

My Set-up

Here you can see my set-up. I like to have everything close-by; the pencil tray sits on top of my Icarus board together with the Swifter Duster and the cotton towel. Taping the paper to the glass can be very helpful especially when burnishing on the warm zone.

My TimerMy Sharpeners


This yellow timer above is my constant companion. It helps me be more productive and more aware of interruptions. Once I got used to it, starting it and stopping it have become second nature.

To the right of my drawing board I keep two sharpeners: the X-Acto School Pro is electrical and works well with different diameter pencils; the Derwent is battery operated and, even though is made for pencils, I've used it to sharpen crayons for many months with no ill effects. The two sharpeners sit inside an acrylic photo frame together with a thick, moist sponge where I clean my pencils after I sharpen them.

The video above is a slide show of River Pebbles, No. 2. Please come back for my next blog post: River Pebbles, No. 2 - A Closer Look, where I will show you a detailed step-by-step of the project.


Good News and Slide Show

I'm thrilled to announce that my artwork Symbiosis won First Place in the San Clemente Art Gallery Winter Judged Show, Mixed Media category.

I'm also very happy that River Odyssey was juried into "Explore This! 8", the Colored Pencil Society of America's online exhibition. This annual exhibition, which opens on February 1st and runs until January 31st, 2013, is for colored pencil artwork that includes some element or technique that is unacceptable for the International Exhibition. This permits artists to experiment with various mediums and surfaces as well as three-dimensional, collage and relief artworks.

Symbiosis - San Clemente Art GalleryRiver Odyssey


I have just uploaded a slide show of River Pebbles, No. 1 to Icarus Art's YouTube Channel. You can view it below.


“River Pebbles, No. 1” - A Closer Look

Last week I introduced the first finished project of my new "small art series". This week I'm giving you a closer look.

Outline - Cool Zone

The outline was accomplished with Prismacolor Premier Verithin Colored Pencils on Art Spectrum Colourfix Supertooth Board. This is a very "toothy" surface without the gritty sandpaper feel. Supertooth Boards are made by coating a 500 gms acid-free, archival watercolor paper with a clear acrylic primer mixed with a blend of silica particles.

I have several large sheets of Supertooth and I was able to easily cut one down to the size I needed with an x-acto knife. I noticed that the texture is somewhat variable from sheet to sheet. Next time I will buy the Supertooth primer instead - it's a lot less expensive and will give me more control on the final texture.

"River Pebbles, No. 1" will be mounted on a 6" x 6" Ampersand Claybord with a 2" cradle.

Color Blocking - Cool Zone

In this step I'm blocking-in the main colors of the pebbles. I'm working fairly fast on the cool zone of the Icarus board (no heat yet) and I'm using Prismacolor Premier Soft Core and Caran d'Ache Luminance colored pencils. It's not important to be precise and detailed in this phase.

Burnishing & Blending - Warm Zone

After turning on my Icarus board (maximum temperature) I'm focusing on building up enough pigment so that  the white of the paper is completely obliterated. I've learned to not be afraid of this step - I know by experience that the more pigment is on the paper, the more malleable and workable the pigment becomes.

Burnishing & Blending - Pink Pebble - Step 1 - Warm Zone

Burnishing & Blending - Pink Pebble - Step 2 - Warm Zone

Burnishing & Blending - Green Pebble - Step 1 - Warm Zone

Burnishing & Blending - Green Pebble - Step 2 - Warm Zone

Burnishing & Blending Finished

Highlights - Cool Zone

As you can see from the images above, each pebble gets one or two passages on the warm zone. Most of the times I blend the pigments together without tools - on the large areas I've used a paper stump.

In the final step I reemphasize the highlights with a white colored pencil on the cool zone.

I will be posting a slide show of this project on my Icarus Art YouTube Channel sometime next week. Please subscribe if you haven't done so already.

If you have any questions about my project, feel free to ask them on this blog or make a comment. I'm always glad to hear from you!


New Small Art Series

This is the first work in a new series of small art depicting some of my favorite subjects. The purpose of this series is to produce more regularly while also working on larger pieces. Working small allows me to be more experimental with the Icarus Drawing Board. With each artwork I plan to post something interesting about how I made it.

Coming up soon: How I developed "River Pebbles, No. 1" - Colored Pencil on 6"x 6" Colourfix Supertooth Board.